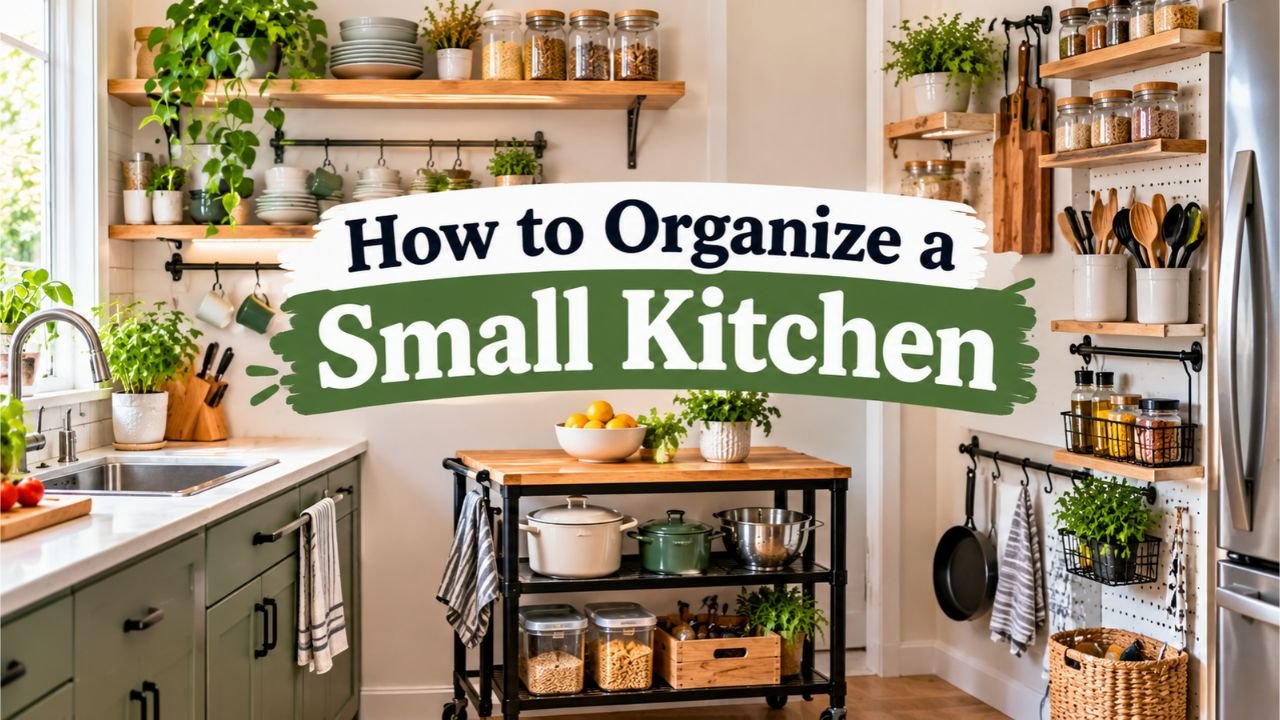
How to Organize a Small Kitchen for Maximum Prep and Storage Space
Setting up a compact cooking area requires clearing non-daily appliances off the counters, grouping kitchen tools into dedicated task zones around the sink and stove, and dividing wasted vertical cabinet space with wire risers, pull-out bins, and door racks. By pairing ruthless decluttering with vertical wall hooks and upright pan dividers, you reclaim prep space and keep every ingredient visible.
Cooking in an overcrowded room quickly turns daily meal preparation into an exhausting obstacle course. When coffee makers, spice bottles, mail piles, and drying dishes cover every inch of the counter, you end up balancing cutting boards over the sink, knocking glass jars onto the floor, and buying duplicate groceries because you cannot see the back of your shelves.
Giving every utensil, pot, and pantry staple a dedicated spot immediately restores your food prep surface and cuts down dinner cleanup time. A structured layout protects sharp knives from getting dulled in jammed drawers, stops heavy pans from scratching one another, and lets you reach cooking oils and spatulas right at the stove without taking extra steps.
Compact culinary footprints are standard across millions of American residences. According to kitchen size research from the National Kitchen and Bath Association (NKBA), while kitchens in U.S. single-family homes average 161 square feet, kitchens in smaller homes under 1,500 square feet average just 103 square feet—and urban U.S. apartment kitchens frequently measure between 50 and 100 square feet.
What stood out to me during my research into compact kitchen layouts is that most spaces do not actually suffer from a lack of square footage; they suffer from wasted vertical air inside existing cupboards and unmapped wall surfaces. Figuring out how to organize a small kitchen means using the full height between shelves, the backs of cabinet doors, and narrow appliance gaps so your main counter stays open for cooking.
Read More: What Color Kitchen Cabinets Are in Style
One detail that ruins many cleanup efforts is buying plastic bins, turntables, and expandable drawer inserts before removing unused kitchen gear and measuring interior shelf depths. Stuffing organizers into a crowded cupboard without purging duplicate gadgets first only shrinks your usable storage space.
Below, you will find practical steps for decluttering kitchen tools, mapping cooking zones, doubling cabinet and drawer capacity, organizing food pantries, and adding vertical wall storage so your kitchen works smoothly every day.
Read More: how to organize a deep kitchen pantry
Decluttering and Zoning a Small Kitchen Before Buying Organizers
Before spending money on shelf risers or matching canisters, you must reduce the sheer volume of items competing for room. Every duplicate spatula, novelty mug, or rarely used waffle iron sitting in a prime cabinet pushes daily plates and prep bowls onto the countertop.
Clearing Duplicate Utensils and Single-Use Kitchen Gadgets
Empty one cabinet and one drawer at a time onto your kitchen table so you can inspect every item you own. In a tight kitchen, duplicates and specialized single-purpose gadgets are the biggest space thieves. You rarely need four whisks, three can openers, twenty plastic takeout tubs with missing lids, or separate electric makers for paninis, donuts, and popcorn.
I recommend keeping only versatile, multi-purpose workhorses in your primary cabinets. An 8-inch chef’s knife, a paring knife, a serrated bread knife, two cutting boards, a 10-inch skillet, a 3-quart saucepan, and a 6-quart Dutch oven or stockpot handle nearly 95 percent of home cooking tasks. Pack holiday roasting pans, specialty baking molds, and oversized serving platters into labeled bins placed in a hall closet or on the very top shelf above upper cabinets.
| Kitchen Category | Keep in Prime Kitchen Storage | Relocate or Donate |
| Knives & Prep Tools | Chef’s knife, paring knife, bread knife, 2 cutting boards, 1 colander | Duplicate peelers, garlic presses, dull steak knives, single-use slicers |
| Cookware & Bakeware | 10-inch skillet, 3-quart pot, 6-quart stockpot, 2 rimmed sheet pans | Scratched nonstick pans, 4th and 5th saucepans, novelty cake tins |
| Small Appliances | Daily coffee maker, toaster or air fryer used 4+ times weekly | Bread machines, fondue pots, ice cream makers, slow cookers used twice a year |
| Food Storage & Mugs | 1 matching nesting glass container set, 2 mugs per household member | Warped plastic takeout tubs, lidless containers, promotional souvenir cups |
Setting Up Four Functional Kitchen Work Zones
Once you pare down your belongings to items you genuinely use each week, organize the remaining gear by point-of-use kitchen zoning rather than strict object categories. Storing an item within one step of where you actually use it eliminates extra walking and stops clutter from piling up on the counter:
- Zone 1: The Prep Zone (Main Open Counter): Store cutting boards, mixing bowls, chef’s knives, measuring cups, colanders, and food wrap right above or below your widest stretch of open counter.
- Zone 2: The Cooking Zone (Range and Oven): Keep skillets, saucepans, pot lids, baking sheets, wooden spoons, spatulas, cooking oils, and everyday spices in the cabinet or drawer immediately beside the stove.
- Zone 3: The Cleaning Zone (Sink and Dishwasher): Place daily dinner plates, bowls, drinking glasses, dish soap, sponges, microfiber towels, and trash bags right next to or under the sink so unloading clean dishes takes seconds.
- Zone 4: The Pantry and Beverage Zone: Dedicate one tall cabinet, rolling cart, or corner shelf near the refrigerator to dry foods, snacks, coffee beans, mugs, and water bottles.
Measuring Cabinet Depth, Shelf Height, and Drawer Clearance
Never guess dimensions when shopping for small kitchen storage products. Standard American base cabinets measure 24 inches deep, while standard upper wall cabinets measure 12 inches deep, yet older apartments and compact galley kitchens frequently use custom shallow cabinetry measuring only 9.5 to 11 inches deep.
Pull out a steel tape measure and write down the exact interior width, depth, and vertical height of every shelf and drawer. In my research, I found that many expandable bamboo drawer dividers stand 2.75 inches tall, which causes them to jam inside shallow apartment utility drawers that only offer 2.25 inches of vertical clearance.
Key Takeaway: Purge duplicate utensils and rarely used appliances first, divide your kitchen into prep, cooking, cleaning, and pantry zones, and measure exact interior shelf and drawer dimensions before buying any organizers.
How to Organize a Small Kitchen by Maximizing Countertop Space
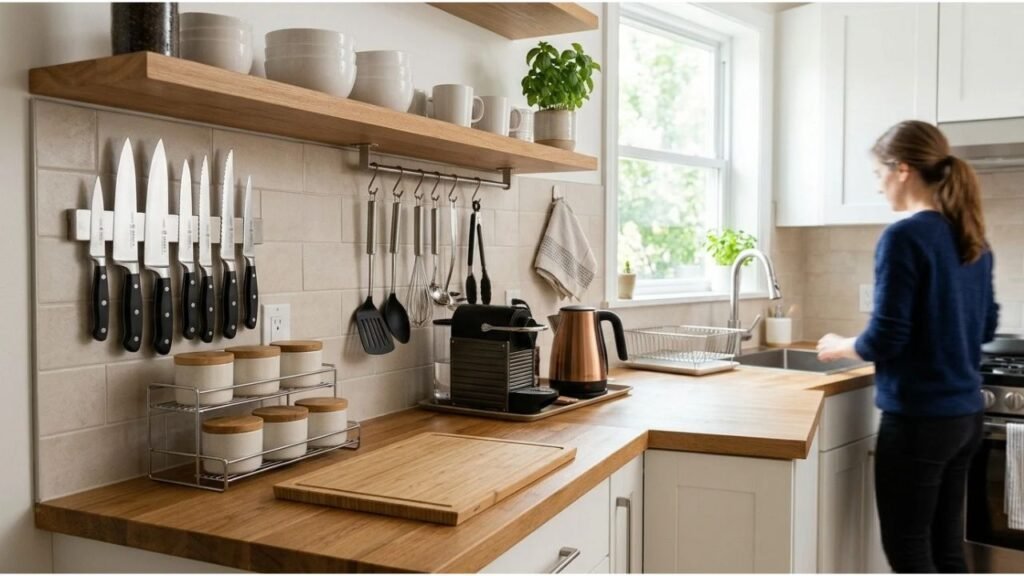
Countertop real estate is the most valuable asset in a small kitchen. According to NKBA kitchen planning guidelines, a functional kitchen needs dedicated landing areas beside the sink, cooktop, and refrigerator, ideally totaling at least 158 linear inches of frontage—yet many one-wall and small galley kitchens offer less than 78 linear inches of total counter space. Keeping counters clear makes a cramped room look twice as wide and gives you room to chop safely.
Applying the One-Daily-Appliance Countertop Rule
Walk into your kitchen and look at every plugged-in machine sitting on the counter. If you keep an espresso maker, a four-slice toaster, a stand mixer, a blender, an air fryer, and an electric kettle out permanently, you have zero room left to roll dough or slice vegetables.
Apply the daily-use counter rule: only appliances used every single day earn permanent counter space. If you brew coffee every morning, the coffee maker stays out. If you use the toaster twice a week and the blender on Sundays, tuck them inside a lower cabinet, place them on a freestanding wire utility rack, or store them on a refrigerator top shelf so your primary prep counter stays 80 percent bare.
Reclaiming Sink and Stovetop Surfaces With Fitted Covers
When built-in counters are tiny, your sink basin and burner grates can double as sturdy work surfaces whenever the water and heat are turned off:
- Over-the-Sink Cutting Boards: A wood or composite over-the-sink cutting board fitted with an integrated mesh colander straddles your sink bowl, turning open air into a rigid chopping station where vegetable peels drop straight into a strainer.
- Roll-Up Silicone Dish Drying Mats: Ditch bulky plastic countertop dish drainers. A stainless-steel and silicone roll-up drying rack lays flat across one side of the sink for air-drying washed pots and rolls up into a 2-inch cylinder inside a drawer once dishes are dry.
- Wooden or Steel Stovetop Covers: Once gas grates or electric coils have cooled completely, placing a fitted wooden noodle board or stainless burner cover over the range creates a flat, 30-inch-wide table for assembling ingredients or cooling baked goods.
Safety Tip: Never place a wooden or silicone stovetop cover over warm burners, and always verify that gas knobs cannot be bumped accidentally while the cover is resting on the range.
Containing Countertop Essentials on One Corner Tray
Loose olive oil bottles, salt cellars, and pepper mills migrating across the counter make a kitchen look messy and slow down wiping the surface. Corral the three or four cooking staples you reach for daily onto a single 9-inch stainless-steel Lazy Susan turntable or a small ceramic tray tucked tight into a back corner near the stove. When you need to wipe down the counter after cooking, you lift one tray with one hand instead of moving six greasy bottles individually.
Key Takeaway: Restrict counter space to appliances used every day, turn cooled stovetops and sink basins into prep surfaces with fitted covers, and group daily cooking oils onto a single corner tray.
How to Double Cabinet and Cupboard Storage in a Small Kitchen
Standard kitchen cupboards waste nearly half of their interior volume because fixed shelves sit 12 to 15 inches apart, while a stack of six dinner plates or a row of coffee mugs only stands 5 inches tall. Splitting that empty vertical gap doubles your cabinet capacity overnight.
Splitting Tall Shelves With Wire Risers and Under-Shelf Baskets
Expandable metal cabinet shelf risers act like portable mini-tables inside your cupboards. Place dinner plates underneath the wire platform and set salad bowls or coffee mugs on top, allowing you to slide dinner plates out without lifting heavy stacks of bowls first.
If you still have 4 inches of dead air above your bowls, slide a coated wire under-shelf hanging basket onto the upper shelf plank. These clip-on wire sleeves hang neatly beneath the shelf, holding aluminum foil boxes, parchment paper rolls, napkins, or flat tortilla packages without taking up any shelf floor.
Filing Skillets, Baking Sheets, and Cutting Boards Vertically
Stacking heavy frying pans, glass casserole dishes, and metal cookie sheets flat in a nested pile guarantees loud clanging and chipped enamel every time you reach for the bottom pan. Instead, place an adjustable vertical wire bakeware and pan organizer inside your lower cabinet.
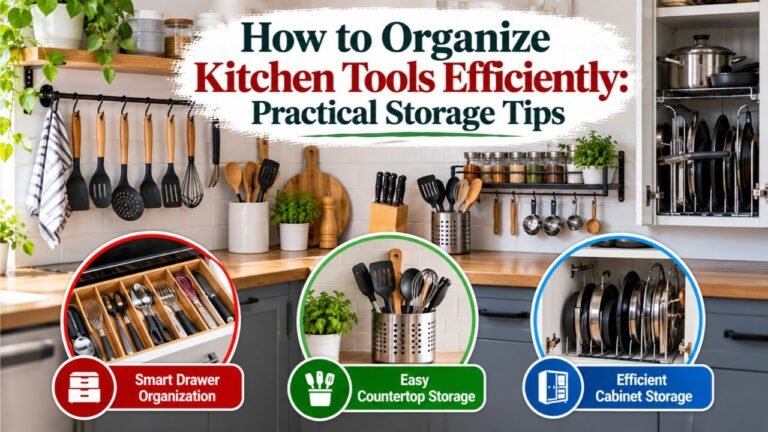
Just like vertical folders in a filing cabinet, each slot holds an individual skillet, pot lid, cooling rack, muffin tin, or cutting board upright on its edge. You can pull out a single 12-inch frying pan or rimmed sheet pan with one hand while the rest of the cookware stays upright in place.
Turning Deep Lower Cabinets Into Accessible Storage With Pull-Out Caddies
Deep lower base cabinets and awkward blind corner cabinets are notorious black holes where Tupperware lids and small appliances disappear. If you are a homeowner or have landlord permission, installing heavy-duty ball-bearing pull-out wire drawers on the bottom floor of your base cabinets brings the back row straight out into the light.
If you want a zero-tool renter alternative, place two deep rectangular plastic storage bins with front grip handles side-by-side on the cabinet shelf, or set a high-walled 14-inch Lazy Susan turntable in deep corner cupboards. Instead of kneeling on the linoleum and reaching blindly into the dark, you simply slide the entire plastic bin out like a drawer.
Hanging Spice Racks and Lid Organizers Inside Cabinet Doors
The interior face of every wooden cabinet door sits about 1 to 1.5 inches clear of the shelf edges when closed. Putting the backs of your cabinet doors to work frees up entire shelves inside the cupboard:
- Inside Pantry Doors: Mount narrow over-the-cabinet-door metal spice racks or clear acrylic packet bins to hold seasoning jars, gravy mixes, and tea boxes.
- Inside Cookware Cabinet Doors: Attach adhesive stainless-steel pot lid holders paired with small Command hooks to suspend pot lids and measuring spoons vertically on the wood panel.
- Inside Under-Sink Doors: Hang an over-the-door wire caddy for dish brushes, extra sponges, rubber gloves, and roll-up trash bags.
Pro Tip: Before screwing or sticking an organizer onto the inside of a cabinet door, close the door slowly while checking where the interior horizontal shelf edge sits. Make sure your door basket mounts either above or below the shelf lip so the door still shuts completely flat.
Key Takeaway: Add wire shelf risers and under-shelf baskets to eliminate wasted vertical air, file pans and baking sheets upright in metal dividers, and mount shallow racks on the inside of cabinet doors.
Organizing Small Kitchen Drawers and Under-Sink Plumbing Gaps
Small kitchens frequently have only one or two shallow drawers alongside a cramped cabinet underneath the sink plumbing. Bringing structure to both areas stops utensils from jamming drawer slides and keeps cleaning supplies dry.
Fitting Angled Silverware Trays and Bamboo Dividers Into Shallow Drawers
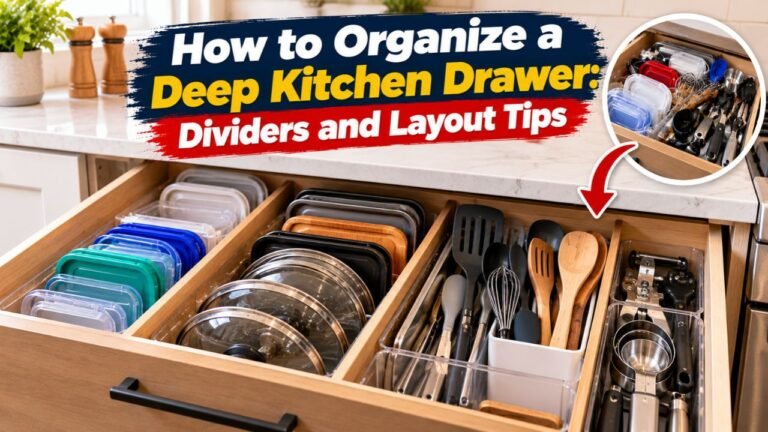
Traditional flat cutlery trays spread five categories of forks and spoons across 14 to 16 inches of drawer width. If your kitchen only has one narrow 10-inch or 12-inch wide drawer, swap that flat tray for an overlapping angled silverware organizer. By stacking forks, knives, and spoons in tiered diagonal slots, an angled caddy cuts the width required for flatware in half, freeing up the other side of the drawer for chef’s knives or cooking tongs.
For wider drawers holding spatulas, whisks, and thermometer probes, insert spring-loaded expandable bamboo drawer dividers running front-to-back. Grouping long tools parallel to the drawer walls stops potato mashers and ladles from popping upward and blocking the drawer from opening.
Wrapping Expandable Shelving Around Under-Sink Drain Pipes
The cabinet under the kitchen sink is often wasted because the curved PVC or metal P-trap drain pipe and garbage disposal hang right down the middle of the enclosure. Tossing spray bottles and detergent tubs loosely onto the cabinet floor leaves the upper 18 inches of space empty.
Install a two-tier expandable under-sink pipe rack featuring removable plastic or steel shelf panels. You simply slide the metal frame widthwise to match your cabinet and leave out the two center slats right where the vertical drain tailpiece drops down. Flanking the plumbing pipe with a two-tier L-shaped sliding drawer organizer lets you store tall spray bottles on the bottom tier and dishwasher pods, sponges, and microfiber cloths on the top sliding basket.
Keep in Mind: Always place liquid cleaners, bleach bottles, and extra dish soap inside waterproof plastic tubs rather than setting bottles directly on the particleboard cabinet floor. A five-dollar plastic bin prevents leaky bottles or slow plumbing drips from warping your cabinet wood.
Key Takeaway: Use overlapping diagonal flatware caddies to save drawer width, divide cooking utensils with front-to-back tension dividers, and wrap two-tier pull-out racks around under-sink drain pipes.
Pantry and Refrigerator Organization Ideas for a Small Kitchen
Whether your dry food lives in a single narrow cupboard, a reach-in closet, or on open shelves, poor visibility causes expired food and messy spills. Applying the same containment rules to both your dry pantry and your refrigerator maximizes every cubic inch of food storage.
| Food Storage Zone | Best Organizer Type | Ideal Items to Store |
| Eye-Level Pantry Shelf | Clear pull-out acrylic bins (10 to 12 in deep) | Daily snacks, pasta packs, breakfast bars, nut butters, tortillas |
| Tight Corner or High Shelf | 11-inch high-walled Lazy Susan turntable | Cooking oils, vinegars, soy sauce, honey, hot sauces, canned goods |
| Lower Shelf or Deep Pantry | Square stackable airtight canisters | All-purpose flour, sugar, white rice, rolled oats, dry beans, cereal |
| Spice Shelf | 3-tier stadium step riser or drawer insert | Uniform 4-ounce glass spice jars with top and front labels |
| Refrigerator Shelves | Clear BPA-free fridge bins & egg drawers | Yogurt cups, cheese blocks, deli meats, condiments, fresh berries |
Grouping Dry Pantry Staples in Clear Pull-Out Bins and Turntables
Have you ever bought a third bottle of balsamic vinegar or cumin simply because the first two were hidden behind tall cereal boxes? Deep pantry shelves trap small jars in dark back rows.
Divide your dry food shelves using clear acrylic pull-out pantry bins grouped by meal or cooking function: one bin for “Grains and Pasta,” one for “Baking Ingredients,” one for “Quick Snacks,” and one for “Canned Beans and Tomatoes”. To read every spice label at a glance, set a three-tier expandable stadium step riser on your eye-level shelf so back-row bottles stand 3 inches higher than front-row bottles.
Knowing When to Decant Dry Goods Into Square Stackable Canisters
Decanting every single grocery item into matching jars looks nice on social media, but it can quickly become a chore if the canister holds less than the package you bought. My preference here is selective decanting: transfer only messy bulk dry goods that come in floppy paper sacks or oversized cardboard boxes—such as flour, sugar, rice, oats, breadcrumbs, and cereal—into square, airtight, stackable food canisters.
Square and rectangular containers eliminate the wasted circular corner gaps left by round mason jars, saving roughly 20 percent of linear shelf space while allowing you to stack a half-height sugar bin directly on top of a tall flour bin. Keep packaged snacks, ramen packs, and pouches in their original wrappers inside open-top bins so refilling after a grocery run takes zero extra effort.
Structuring Refrigerator Shelves to Stop Food Waste
An overcrowded small refrigerator wastes money when fresh produce rots hidden behind leftover pots. Replace bulky round cooking pots in the fridge with square stackable glass meal-prep containers that stack three high on a single shelf.
Use clear narrow refrigerator bins to corral small items like yogurt tubs, string cheese, and condiment squeeze bottles so you can slide out the whole bin to reach items in the back. Reserve the refrigerator door racks—the warmest part of the appliance—strictly for pasteurized condiments, salad dressings, and juices, while keeping milk and raw eggs on the colder interior middle and lower shelves.
Key Takeaway: Group pantry foods by category inside clear pull-out bins, selectively decant floppy flour and cereal bags into square stackable canisters, and store leftovers in flat-lid glass containers inside the fridge.
Vertical Wall, Ceiling, and Gap Storage Ideas When Cabinets Are Full
When your drawers and cupboards are completely optimized and you still have cookware left over, look at your vertical walls, appliance sides, and narrow floor gaps. These overlooked surfaces can hold an entire cabinet’s worth of heavy pots and utensils.
Mounting Magnetic Knife Strips, Pegboards, and Backsplash Rails
Your backsplash and empty wall panels sit right at arm’s reach during meal prep:
- Magnetic Knife Strips: Mounting a 16-inch heavy-duty magnetic knife bar onto the backsplash wall gets your bulky wooden knife block off the counter and keeps sharp blades safely out of crowded drawers.
- Under-Cabinet and Backsplash Rails: Installing a slim brass or stainless-steel wall rail with S-hooks underneath your upper cabinets lets you hang measuring cups, slotted turners, ladles, small saucepans, and coffee mugs in the dead air above the backsplash.
- Wall-Mounted Pegboards: If you have a blank wall next to the stove or dining nook, anchor a metal or painted wood pegboard into wall studs to hang heavy skillets, colanders, cutting boards, and oven mitts vertically like a professional restaurant kitchen.
Attaching Magnetic Organizers to the Sides of the Refrigerator
Unless your refrigerator is built inside wood cabinetry, both steel sides of the fridge offer roughly 10 to 15 square feet of magnetic vertical storage. Stick a heavy-duty magnetic refrigerator side rack onto the steel panel closest to your counter.
Without drilling a single screw hole, a two-tier magnetic rack securely supports 10 to 15 pounds of paper towel rolls, spice jars, olive oil bottles, aluminum foil boxes, and hanging dish towels right beside your workspace.
Sliding Slim Rolling Carts Into Narrow Appliance Gaps
Measure the narrow dead slot between your refrigerator and the adjacent wall or counter. Most small kitchens have an awkward 5-inch to 9-inch wide gap next to the fridge for door swing clearance.
Sliding a four-tier slim rolling gap cart on smooth caster wheels into that slot creates a hidden pull-out pantry for canned goods, tall oil bottles, soda cans, and boxed broths. If you have a slightly wider 18-inch by 24-inch floor corner, adding a locking rolling butcher-block utility cart gives you both a movable chopping island and three open shelves for heavy Dutch ovens and mixing bowls.
Helpful Insight: Do not forget the space between the top of your upper cabinets and the ceiling. If your cupboards stop 12 to 18 inches below the ceiling, place matching woven baskets or lidded white storage bins up top to conceal paper towel bulk packs, seasonal baking gear, and slow cookers without collecting greasy kitchen dust.
Key Takeaway: Hang knives and utensils on backsplash rails and magnetic strips, stick magnetic spice and paper towel racks onto refrigerator sides, and slide a narrow rolling cart into the gap beside your fridge.
5 Steps to Reset and Maintain an Organized Small Kitchen
Organizing a small kitchen is not a one-time marathon; it is a simple workflow that prevents clutter from creeping back onto the counters. Follow this five-step sequence to set up your kitchen and keep it spotless:
- Empty, Purge, and Clean One Zone at a Time: Never pull everything out of every cupboard at once, or you will get overwhelmed mid-afternoon. Start with the prep zone or silverware drawer, remove duplicates, wipe the interior shelves clean, and put back only daily essentials.
- Place High-Frequency Items Between Waist and Eye Level: Store the plates, glasses, skillets, and ingredients you touch every single day on the bottom shelf of upper cabinets or the top drawer of base cabinets. Reserve low floor shelves for heavy stockpots and high ceiling shelves for holiday gear.
- Install Vertical Dividers and Door Racks After Measuring: Once your zones are mapped and measured, slide in your wire shelf risers, vertical pan dividers, clear pull-out pantry bins, and over-the-door spice racks.
- Practice the One-In, One-Out Rule: Small kitchens have a strict physical limit. Whenever you buy a new coffee mug, specialty pan, or kitchen gadget, donate or recycle an older item from that same category so your shelves never overflow.
- Run a 5-Minute Nightly Counter Reset: Before turning off the kitchen light each night, load the dishwasher or dry the last pan, roll up your sink drying mat, return cooking oils to their corner tray, and wipe the main prep counter completely bare for morning coffee.
Common Small Kitchen Organization Mistakes to Avoid
Even well-intentioned storage projects can backfire if the setup fights your daily cooking habits. Watch out for these common pitfalls:
- Buying Storage Bins Before Decluttering and Measuring: Ordering a 20-piece canister set or drawer divider kit before purging unused items leaves you organizing clutter and dealing with bins that are half an inch too deep for your cabinet doors to close.
- Hanging Grease-Trapping Pot Racks Directly Over the Stove: While hanging pots from a ceiling rack looks great, suspending pans directly over an unvented range coats your clean cookware in airborne cooking grease and steam. Hang pot racks over the sink area, a blank wall, or a prep cart instead.
- Storing Cooking Oils and Spices Right Above the Range: Heat and steam rising from boiled water and oven vents quickly degrade ground spices and turn olive oil rancid. Keep spices and oils in a cool cabinet or on a magnetic rack to the side of the stove, never directly above the burners.
- Stacking Heavy Appliances Above Shoulder Height: Placing a heavy glass blender pitcher, food processor with sharp blades, or cast-iron pot on a high shelf forces you to lift awkward weight overhead with wet hands. Keep heavy items below chest level.
- Overcrowding Every Square Inch of Wall Space: Covering every wall with open shelves and dangling tools can make a narrow galley kitchen feel claustrophobic and visually noisy. Balance open hanging rails with matching opaque bins to give the eye a clean place to rest.
Conclusion
Knowing how to organize a small kitchen comes down to clearing non-daily items off the countertop, organizing your cupboards by cooking task zones, and dividing empty vertical cabinet air with wire risers, upright pan racks, and pull-out bins. When every shelf height, cabinet door back, and narrow refrigerator gap has a clear job, even a compact 70-square-foot apartment kitchen feels spacious and effortless to cook in.
Start by clearing your main prep counter down to just one daily appliance and purging duplicate utensils that jam your drawers. Group your pots near the stove, your dishes beside the sink, and your pantry staples inside clear pull-out containers so nothing gets lost in the back of a dark cupboard.
I recommend picking just one frustrating spot today—such as your main prep counter or your utensil drawer—and spending twenty minutes resetting it before measuring your shelves for risers. Once you reclaim a single clear workspace and store your daily tools within arm’s reach, cooking dinner becomes faster, safer, and far more enjoyable.
FAQs About Organizing a Small Kitchen
What is the first step in organizing a small, cluttered kitchen?
Start by clearing everything off your primary countertop and emptying one drawer or cabinet at a time to purge duplicates, broken tools, and expired food. Removing single-use gadgets and duplicate spatulas immediately frees up 20 to 30 percent of your cabinet space before you spend a single dollar on storage bins or shelf risers.
Where should I put small appliances in a small kitchen with no counter space?
Keep only the one appliance you use every single morning—like a coffee maker—on the countertop. Store weekly appliances like blenders, slow cookers, and toaster ovens on a freestanding vertical wire shelving unit, a rolling utility cart, inside deep lower base cabinets, or inside matching lidded bins on top of your upper cabinets.
How do I organize pots and pans in a small kitchen with limited cabinets?
Stop nesting pots flat inside one another and instead use an adjustable vertical metal pan organizer inside a lower cabinet so skillets, lids, and baking sheets stand upright on their edges. You can also hang daily saucepans and frying pans vertically on a stud-mounted wall pegboard or a heavy-duty wall rail with S-hooks.
How can I organize a small kitchen with only one drawer?
Reserve your single drawer strictly for everyday flatware and core prep tools like a vegetable peeler and can opener. Use an overlapping angled cutlery tray to cut the width needed for forks and spoons in half, mount your sharp knives on a wall-mounted magnetic strip, and store long cooking spoons and spatulas upright in a countertop crock beside the stove.
What is the best way to store spices in a tiny kitchen?
Mount a tiered wire spice rack on the inside of your pantry or cupboard door, attach magnetic spice tins directly to the steel side of your refrigerator, or place a three-tier stadium step riser inside an upper cabinet. Avoid storing spices directly above the stove, where rising heat and steam ruin their flavor.
How do I add pantry storage if my small kitchen has no pantry closet?
Turn a standard upper cabinet into a high-density mini-pantry using clear acrylic pull-out bins and a turntable for oils, or bring in a tall, narrow bookcase (10 to 12 inches deep) along an adjacent hallway or dining wall. You can also slide a 6-inch-wide rolling cart into the gap beside your refrigerator or hang a full-length pantry rack over the back of the kitchen door.



One Comment