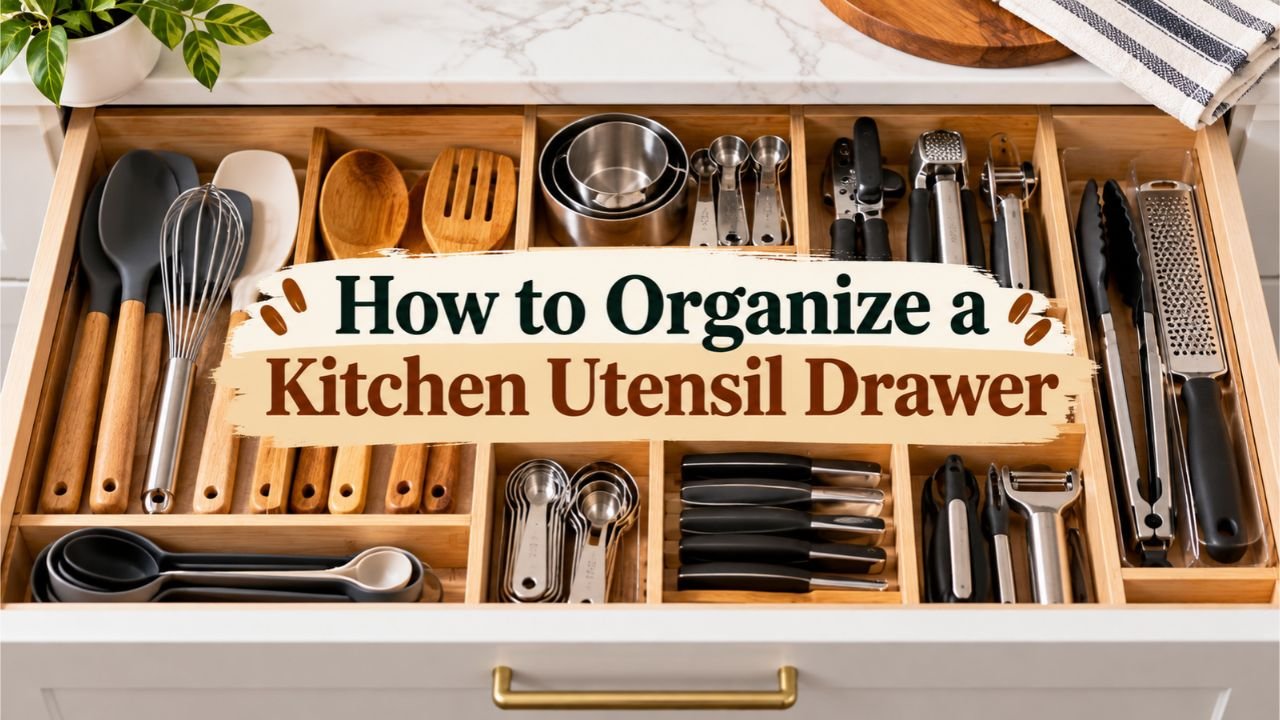
How to Organize a Kitchen Utensil Drawer: 12 Easy Steps
A well-organized kitchen utensil drawer keeps cooking tools easy to find, grab, and return. Start by removing everything, sorting utensils by purpose, and measuring the available space. Use adjustable dividers or small containers to separate different tools, place frequently used utensils near the front, and move oversized or rarely used items elsewhere.
An overcrowded utensil drawer can make simple cooking tasks frustrating. Spatulas become tangled with whisks, measuring spoons disappear beneath larger tools, and sharp utensils may end up mixed with everyday kitchen accessories.
The solution is not necessarily buying expensive drawer organizers. A practical arrangement begins with understanding which utensils belong in the drawer, how often they are used, and how much space each item requires.
A small drawer can work surprisingly well when its contents are carefully selected. Larger drawers offer more flexibility, but they can become just as messy without clearly defined storage areas.
When researching how to organize a kitchen utensil drawer, I found that the most useful approach combines three principles: grouping similar tools, keeping daily essentials accessible, and giving every item a consistent location. These simple habits make it easier to maintain the arrangement after the initial organization.
The right drawer layout also depends on the kitchen. A narrow drawer beside the stove needs a different arrangement from a deep drawer beneath an island countertop.
The following guide explains how to declutter, measure, divide, and arrange kitchen utensil drawers. It also covers small-kitchen storage, inexpensive organizers, safe knife storage, drawer cleaning, common mistakes, and maintenance habits that keep everything organized.
How Do You Organize a Kitchen Utensil Drawer?
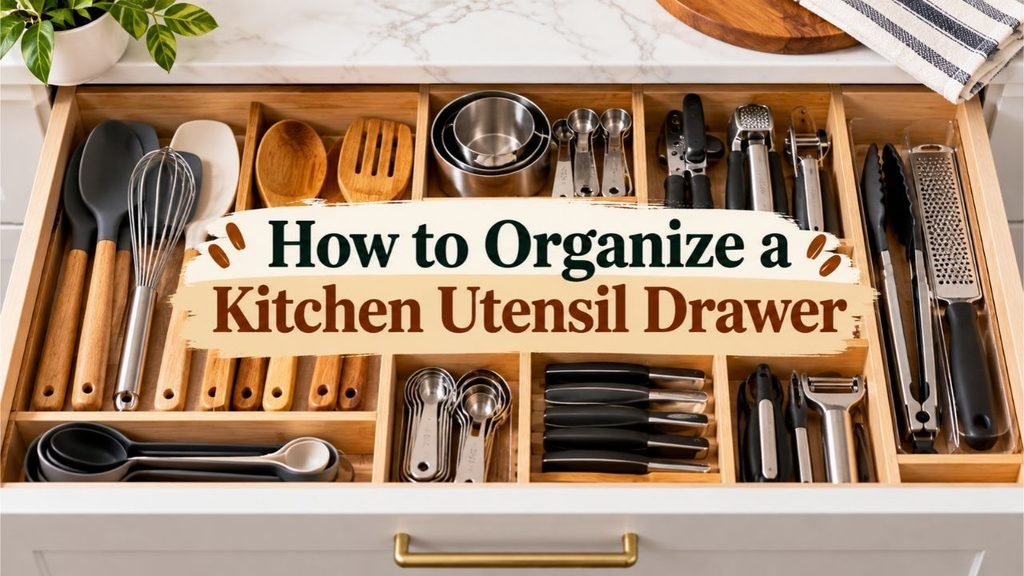
The simplest method is to organize utensils according to how frequently they are used and how much space they occupy.
Follow these seven basic steps:
- Empty the drawer completely. Remove every utensil, divider, and loose item.
- Sort everything into categories. Separate spatulas, spoons, tongs, measuring tools, and other accessories.
- Remove unnecessary items. Relocate duplicates, damaged tools, and rarely used gadgets.
- Measure the drawer. Check its internal width, length, depth, and available clearance.
- Choose suitable dividers. Use expandable trays, modular bins, or adjustable compartments.
- Arrange utensils by frequency of use. Keep daily tools in the easiest-to-reach sections.
- Leave room for movement. Make sure items can be removed without tangling and the drawer closes smoothly.
The goal is not to fill every available inch.
A little open space makes it easier to remove utensils and return them to their assigned compartments.
What Should You Keep in a Kitchen Utensil Drawer?
Before arranging anything, determine which tools deserve space in the drawer.
A utensil drawer should primarily store items used during ordinary food preparation and cooking.
Everyday Cooking Utensils
These are the tools most likely to deserve the easiest-to-reach positions:
- Silicone spatulas
- Wooden spoons
- Slotted spoons
- Cooking tongs
- Small whisks
- Ladles
- Vegetable peelers
- Measuring spoons
- Can openers
- Small serving utensils
Not every kitchen needs all these items in the same drawer.
For example, someone who keeps large spatulas in a countertop crock may use the drawer mainly for peelers, measuring tools, and smaller accessories.
The best arrangement reflects actual cooking habits.
Occasionally Used Kitchen Tools
Some utensils are useful but do not need prime drawer space.
Examples include:
- Citrus zesters
- Melon ballers
- Apple corers
- Specialty vegetable cutters
- Pastry brushes
- Seafood picks
- Extra serving spoons
- Small baking accessories
These items can be stored toward the back of a drawer or in a separate compartment.
If an item is used only a few times each year, it may belong in a secondary kitchen storage area.
Items That Should Usually Be Stored Elsewhere
Certain objects occupy too much space or create safety concerns when stored loosely.
These include:
- Large rolling pins
- Oversized ladles
- Long barbecue tongs
- Bulky potato mashers
- Large box graters
- Loose kitchen knives
- Heavy meat cleavers
- Cleaning chemicals
- Broken or damaged utensils
Long utensils may fit better in a deep drawer or countertop container.
Sharp knives should be stored in a suitable knife block, in-drawer knife organizer, or protective sheath.
Cleaning chemicals should remain separate from cooking tools and food-contact equipment.
Key Takeaway: Reserve the utensil drawer for tools used regularly. Store bulky, sharp, and rarely used items in more suitable locations.
How to Organize a Kitchen Utensil Drawer Step by Step
The following 12-step method works for most standard kitchen drawers.
You can adjust the layout according to the available space and the types of utensils you own.
Step 1: Empty the Kitchen Utensil Drawer Completely
Remove every item from the drawer.
Take out utensils, dividers, trays, drawer liners, loose batteries, paper scraps, and other unrelated objects.
Place everything on a clean kitchen counter or table.
Emptying the drawer allows you to see how much storage space is actually available.
It also reveals items that may have become stuck beneath other utensils.
Avoid organizing around the existing mess.
Starting with a completely empty drawer makes it easier to create a layout that suits the available space.
Practical Tip: Place a towel on the countertop before emptying the drawer. This protects the surface and keeps metal utensils from sliding.
Step 2: Sort Kitchen Utensils Into Categories
Group similar tools together.
A simple sorting system might include:
| Category | Examples |
| Stirring tools | Wooden spoons, silicone spoons |
| Turning tools | Spatulas, turners |
| Gripping tools | Tongs, small serving tongs |
| Mixing tools | Whisks, small mixing utensils |
| Measuring tools | Measuring spoons, small measuring cups |
| Preparation tools | Peelers, zesters, can openers |
| Serving tools | Ladles, serving spoons |
| Specialty tools | Apple corers, pastry brushes, small gadgets |
This process shows how much space each category requires.
For example, you may discover that eight spatulas occupy nearly half the drawer.
Sorting also helps identify tools that do not belong together.
A vegetable peeler and a large soup ladle might both be cooking accessories, but they need different compartment sizes.
Step 3: Remove Duplicates and Unnecessary Tools
Review the contents of each category.
Look for duplicate utensils, broken items, worn tools, and gadgets that are rarely used.
You do not need to eliminate every duplicate.
Two spatulas may be useful when cooking several dishes.
Multiple whisks can also make sense when different sizes serve different purposes.
The goal is to remove items that do not justify their storage space.
Ask yourself:
- Have I used this utensil during the past several months?
- Do I already have another tool that performs the same task?
- Is it damaged or uncomfortable to use?
- Does it belong near the stove, sink, or food-preparation area?
- Would another location be more practical?
Move useful but rarely used tools into a secondary drawer or storage container.
Discard utensils that are broken beyond safe repair.
Donate usable extras when appropriate.
I would prioritize keeping one or two dependable versions of a frequently used utensil rather than filling the drawer with several nearly identical tools.
Step 4: Clean the Drawer Before Adding Organizers
Once the drawer is empty, clean the interior.
Remove loose crumbs, dust, and other debris using a handheld vacuum or soft brush.
Wipe the drawer with a cloth dampened with mild soapy water or a cleaner appropriate for the drawer’s finish.
Pay attention to corners and the area around the drawer runners.
Avoid soaking wooden or engineered-wood drawer surfaces.
Excess moisture can cause swelling or damage to certain cabinet materials.
Wipe away cleaning residue and allow the drawer to dry completely.
Clean any reusable dividers or organizers before returning them.
A clean drawer provides a better starting point and prevents residue from becoming trapped beneath new organizers.
Step 5: Measure the Drawer Carefully
Accurate measurements are necessary before purchasing drawer dividers.
Measure the usable interior space, not the exterior dimensions of the drawer front.
Record four measurements:
- Interior width
- Interior front-to-back length
- Interior depth
- Clearance available when opening and closing the drawer
The fourth measurement is easy to overlook.
A drawer may have enough internal depth for a tall organizer, but the cabinet frame or countertop structure may limit the clearance as the drawer slides shut.
Measure at several points if the drawer walls are not perfectly straight.
Leave a little extra space so the organizer can be inserted and removed without force.
For expandable drawer organizers, confirm that the advertised minimum and maximum widths fit the actual interior.
Example: If a drawer is 18 inches wide inside, an expandable organizer rated for 15–20 inches may fit. You still need to check its length and height.
Step 6: Decide Which Drawer Is Best for Utensils
Drawer location matters because cooking involves repeated movement.
A drawer near the stove is convenient for spatulas, wooden spoons, tongs, and ladles.
A drawer near the main preparation counter may be better for peelers, measuring spoons, small whisks, and food-preparation gadgets.
A drawer near the dishwasher can simplify putting clean utensils away.
If the kitchen has several drawers, avoid forcing every utensil into one location.
Instead, assign each drawer a purpose.
For example:
- Drawer near the stove: Cooking utensils
- Drawer near the preparation area: Measuring and preparation tools
- Drawer near the dining area: Serving utensils
This approach reduces unnecessary movement during cooking.
It also gives each utensil a more logical storage location.
Step 7: Plan Separate Storage Zones
Before installing organizers, decide where each category should go.
A useful utensil drawer layout has three basic zones.
Front zone: Everyday essentials.
Middle zone: Regularly used secondary tools.
Back zone: Less frequently used accessories.
For example, spatulas and tongs might occupy the front compartments.
Measuring spoons and small whisks could sit in the middle.
Occasional specialty tools could remain toward the back.
Another option is organizing from left to right.
One side can hold long utensils, while the opposite side contains smaller compartments for gadgets.
The arrangement should make sense when standing in front of the drawer.
Frequently used items should be visible and easy to reach without lifting other objects.
Step 8: Choose the Right Drawer Organizer
The best organizer depends on the drawer’s dimensions and the shapes of the utensils.
Common options include:
- Expandable drawer trays
- Adjustable drawer dividers
- Modular plastic organizers
- Bamboo drawer organizers
- Long rectangular storage bins
- Custom drawer inserts
- Nonslip drawer liners
For a drawer containing many long cooking utensils, adjustable dividers may work better than a standard cutlery tray.
Cutlery trays are often designed for forks, knives, and spoons.
Their narrow compartments may be too short for spatulas or too shallow for bulky tongs.
Modular containers provide more flexibility.
You can combine long compartments for cooking utensils with smaller sections for measuring tools and gadgets.
My recommendation: Choose organizers that can be removed easily for cleaning and rearranged when your utensil collection changes.
Step 9: Arrange Utensils by Size and Frequency
Begin placing tools into their assigned compartments.
Put the most frequently used items in the easiest-to-reach positions.
Group utensils with similar shapes.
Long spatulas can lie next to other spatulas.
Wooden spoons can share a compartment if they fit without becoming tangled.
Small measuring tools should have their own section.
Arrange handles in a consistent direction when practical.
This makes it easier to grab one utensil without disturbing several others.
Avoid stacking so many tools in one compartment that the bottom items become difficult to reach.
If a compartment is overcrowded, move some items to another location rather than forcing them into place.
Step 10: Give Bulky Utensils a Separate Location
Bulky tools can consume more space than their frequency of use justifies.
Common examples include:
- Potato mashers
- Large balloon whisks
- Deep soup ladles
- Oversized tongs
- Large serving forks
- Wide spatulas
If these items do not fit comfortably, relocate them.
A deep drawer may be appropriate.
A countertop utensil crock can also work for frequently used long tools.
For rarely used bulky accessories, consider a cabinet container or secondary drawer.
Avoid hanging utensils where they interfere with cooking or create a hazard near heat.
The goal is to reserve the main drawer for items that can be stored without excessive overlapping.
Step 11: Store Sharp Utensils Safely
Sharp utensils require special attention.
Vegetable peelers, pizza cutters, kitchen shears, and specialty blades may fit in a utensil drawer, but exposed cutting edges should not be left loose among other tools.
Use protective covers or separate compartments.
Kitchen knives should be stored in an appropriate knife organizer, sheath, or other secure storage system.
If children can access the drawers, use appropriate child-resistant controls and keep dangerous cutting tools out of reach.
Do not place sharp utensils where someone must reach blindly beneath other objects.
Organizing for safety is just as important as making the drawer look tidy.
Step 12: Test the Drawer and Adjust the Layout
Once everything is arranged, close the drawer slowly.
Check that nothing catches against the cabinet frame.
Open the drawer fully and remove several frequently used utensils.
Notice if anything becomes tangled or difficult to reach.
Try returning the tools to their assigned sections.
If the process feels awkward, adjust the compartments.
A good layout should work during ordinary cooking, not just look attractive immediately after organizing.
Use the drawer for several days and observe which items are repeatedly misplaced.
You may discover that tongs deserve a larger compartment or that measuring spoons are more convenient near the front.
Small changes can improve the arrangement considerably.
Key Takeaway: Empty, sort, declutter, clean, measure, divide, and arrange the drawer in that order. Test the finished layout during normal cooking and make adjustments based on actual use.
Best Kitchen Utensil Drawer Layout Ideas
Drawer dimensions affect which arrangement works best.
A wide drawer can support several compartments, while a narrow drawer requires a more selective layout.
How to Organize a Narrow Kitchen Utensil Drawer
A narrow drawer may not have enough space for a standard expandable tray.
Instead, use two or three slim compartments.
Place long utensils parallel to the drawer’s front-to-back direction.
Keep tools with similar widths together.
For example:
- One long section for spatulas and wooden spoons
- One narrow section for tongs and whisks
- One small section for peelers and measuring spoons
Avoid storing several bulky tools in a narrow drawer.
A countertop crock or secondary storage location may be necessary.
How to Organize a Wide Kitchen Utensil Drawer
Wide drawers provide more layout options.
Use adjustable dividers to create long sections for cooking utensils and smaller sections for preparation tools.
A typical arrangement might include:
| Drawer Section | Recommended Contents |
| Left | Spatulas and turners |
| Center-left | Wooden spoons and silicone spoons |
| Center-right | Whisks and tongs |
| Right | Peelers, can opener, measuring tools |
| Rear section | Occasional specialty gadgets |
The exact layout depends on the drawer’s dimensions.
Avoid placing small utensils loosely across a wide open area.
Without dividers, they can slide to the back when the drawer closes.
How to Organize a Shallow Kitchen Utensil Drawer
Shallow drawers are useful for flat or low-profile tools.
Examples include:
- Measuring spoons
- Small spatulas
- Vegetable peelers with blade protection
- Pastry brushes
- Bottle openers
- Small serving utensils
Avoid tall containers or stacked utensils that prevent the drawer from closing.
Low-profile modular trays work well.
Before purchasing an organizer, measure the clearance beneath the cabinet frame.
A tray that technically fits inside the drawer may still interfere with closing.
How to Organize a Deep Kitchen Utensil Drawer
Deep drawers offer more vertical storage space, but stacking utensils carelessly can make the bottom items difficult to reach.
Use longer containers to keep categories separated.
A deeper drawer can also accommodate bulky tools such as ladles and potato mashers.
For very deep drawers, consider separate removable bins.
This allows larger tools to remain organized without requiring a custom insert.
Avoid building tall piles of utensils.
The additional depth should make storage more convenient rather than encourage overcrowding.
How to Organize an Extra-Large Kitchen Drawer
An extra-large drawer can hold both cooking utensils and selected preparation tools.
Still, the drawer should have clearly defined zones.
Consider dividing it into:
- Daily cooking tools
- Food-preparation gadgets
- Measuring utensils
- Baking accessories
- Occasional serving tools
Use adjustable dividers or modular organizers to prevent categories from mixing.
If the drawer has space left over, do not automatically fill it.
Open space can be useful for future tools and easier access.
Key Takeaway: Narrow drawers benefit from slim compartments, wide drawers need clearly defined zones, shallow drawers suit flat tools, and deep drawers work best with removable containers and limited stacking.
Best Kitchen Utensil Drawer Organizers: Types Compared
Drawer organizers come in several designs.
Each type works best for particular utensils and drawer dimensions.
| Organizer Type | Best For | Main Advantage | Main Drawback |
| Expandable bamboo tray | Medium and wide drawers | Adjustable width | Fixed compartment lengths |
| Modular plastic trays | Mixed utensil sizes | Flexible arrangement | Separate pieces may shift |
| Adjustable dividers | Long cooking utensils | Custom compartment widths | Need a secure fit |
| Custom drawer insert | Unusual drawer dimensions | Precise layout | Higher cost |
| Nonslip liner | Simple low-cost organization | Reduces movement | Does not create compartments |
| Long storage bins | Spatulas, whisks, tongs | Suitable for long tools | May waste space if poorly sized |
Expandable Bamboo Drawer Organizers
Bamboo organizers are popular because of their natural appearance.
Expandable models can fit a range of drawer widths.
They are useful for combining smaller utensils in one structured tray.
Still, standard bamboo cutlery organizers may not fit large cooking tools.
Check compartment length before purchasing.
Also consider cleaning.
Bamboo should not remain damp for long periods, and many bamboo organizers are intended for hand cleaning rather than dishwasher use.
Modular Plastic Drawer Trays
Modular trays are among the most flexible options.
They come in different lengths and widths.
You can use a long tray for spatulas and smaller containers for measuring spoons.
Plastic trays are generally lightweight and straightforward to wipe clean.
The main concern is movement.
If several containers fit loosely, they may slide when the drawer opens or closes.
A nonslip liner can reduce that problem.
Adjustable Drawer Dividers
Adjustable dividers create sections directly inside the drawer.
They are useful when the main items are long spatulas, wooden spoons, and tongs.
Instead of fitting tools into fixed tray compartments, you can adjust the available width for each group.
Some dividers use spring tension, while others use mechanical locks or other fastening systems.
Check the attachment method and compatibility with the drawer finish.
Avoid forcing a divider tightly against thin drawer walls.
Custom Drawer Inserts
Custom inserts are designed for particular drawer measurements.
They can provide a clean appearance and use space efficiently.
This option may be attractive in newly renovated kitchens or drawers with unusual dimensions.
The drawback is cost.
A custom insert may also be less flexible if the utensil collection changes.
For most ordinary kitchen drawers, adjustable or modular organizers are sufficient.
Nonslip Drawer Liners
Nonslip liners are inexpensive accessories used beneath utensils or organizer trays.
They help reduce sliding when the drawer opens and closes.
Some liners can be trimmed to size.
Choose a material suitable for the drawer surface and follow the manufacturer’s cleaning recommendations.
Avoid adhesive products that may damage cabinet finishes, especially in rental properties.
A liner can improve organization, but it does not replace dividers when many small utensils need separate sections.
Key Takeaway: Adjustable dividers are useful for long cooking tools, modular trays offer the most flexibility, and expandable bamboo organizers suit drawers with compatible dimensions. Nonslip liners improve stability.
How to Organize Different Kitchen Utensils in Drawers
Not every utensil category needs the same storage method.
Grouping tools according to shape makes the drawer easier to use.
How to Store Spatulas and Wooden Spoons
Spatulas and wooden spoons are often long and relatively flat.
Store them lengthwise in a dedicated compartment.
Arrange the handles in a consistent direction.
Keep very wide spatulas separate from narrow wooden spoons if they become tangled.
A drawer near the stove is a practical location.
For a large collection, consider moving a few frequently used tools into a countertop utensil holder.
How to Store Whisks and Tongs
Whisks and tongs can take up more space because of their shape.
Store them in long compartments with enough width to prevent squeezing.
If tongs have locking mechanisms, close them before storage.
This can reduce the amount of space they occupy.
Avoid placing heavy utensils on top of delicate whisks.
The wires may bend, especially on lightweight models.
How to Store Measuring Spoons and Cups
Measuring spoons are small and easy to misplace.
Keep them together in a shallow compartment.
If the set has a suitable ring, storing them connected may prevent individual spoons from disappearing.
Measuring cups can be nested when their design permits it.
Place them where they can be removed without shifting larger utensils.
For frequent bakers, a dedicated baking-tool drawer may be more convenient than combining everything with stovetop utensils.
How to Store Peelers, Zesters, and Small Gadgets
Small preparation tools need compact compartments.
Avoid dropping them into a large space with long cooking utensils.
Store vegetable peelers and sharp zesters so their cutting edges are protected.
Separate small gadgets by purpose if space allows.
For example, put peelers and corers together while keeping bottle openers and other accessories in a different section.
How to Store Ladles and Serving Spoons
Ladles have deep heads and can occupy substantial drawer space.
A shallow drawer may not close properly when several ladles are stacked.
Store large ladles in a deeper drawer or a suitable utensil crock.
Smaller serving spoons can share a long compartment.
Do not force bulky utensil heads beneath drawer rails or the cabinet frame.
How to Store Kitchen Shears and Sharp Tools
Kitchen shears, small blades, and similar tools should have protected cutting edges.
Keep kitchen shears closed when stored.
Use a designated compartment where they cannot become buried beneath other utensils.
For knives, choose a proper in-drawer organizer or another secure storage system.
Avoid leaving exposed blades loose in a general-purpose utensil drawer.
Key Takeaway: Match each utensil category to the compartment shape it needs. Long tools require length, bulky tools need depth, and sharp tools need secure storage.
How to Organize a Kitchen Utensil Drawer Without Dividers
A drawer organizer is useful, but it is not mandatory.
An organized drawer can be created using inexpensive containers and careful placement.
Use Small Washable Containers
Look for shallow containers that fit the drawer.
Suitable options may include:
- Small plastic storage trays
- Shallow desk-organizer bins
- Washable rectangular containers
- Long narrow household organizer trays
Choose containers without sharp edges.
Make sure they are easy to remove and clean.
Use several small containers rather than one oversized bin that allows everything to mix.
Use a Nonslip Liner
Cut a suitable liner to fit the drawer bottom.
This reduces how much utensils and containers slide.
It is particularly useful when the drawer opens quickly.
The liner should lie flat.
Avoid bunching, curling, or excessive thickness that interferes with closing.
Create Simple Tool Groups
Even without physical dividers, arranging tools by shape helps.
Place long spatulas along one side.
Put wooden spoons beside them.
Keep measuring tools in a small container.
Limit the number of categories inside the drawer.
An open drawer containing only six to eight regular utensils may remain organized without a complicated insert.
Use Removable Containers Instead of Permanent Alterations
For rental kitchens, removable organizers are especially practical.
They can be cleaned and transferred to another kitchen.
Avoid drilling into drawer sides or attaching permanent dividers without permission.
A simple removable system can provide much of the benefit of a custom organizer.
Key Takeaway: Washable containers, nonslip liners, and consistent tool grouping can organize a drawer without expensive inserts or permanent modifications.
How to Organize Kitchen Utensils in a Small Kitchen
Small kitchens have limited drawer and counter space.
The best approach is to reduce unnecessary items and divide storage according to daily tasks.
Keep Only Essential Utensils in the Main Drawer
A small drawer should not hold every kitchen gadget.
Prioritize the tools used almost daily.
For example:
- One spatula
- One wooden spoon
- One pair of tongs
- One whisk
- One vegetable peeler
- One measuring spoon set
- One can opener
The exact selection depends on cooking habits.
Store occasional baking tools or serving accessories elsewhere.
This gives the essential utensils enough room to remain visible.
Use Vertical Storage for Long Utensils
Long cooking utensils may fit better in a countertop crock than in a narrow drawer.
A stable utensil holder near the cooking area can accommodate wooden spoons, spatulas, and tongs.
Keep it away from direct burner heat and areas where grease or splashing water creates cleaning problems.
For kitchens with suitable wall space, properly mounted hooks or rails can provide another option.
Avoid placing sharp or heavy utensils where they might fall.
Use Different Drawers for Different Tasks
If the kitchen has several small drawers, separate tools by purpose.
One drawer can hold cooking utensils.
Another can hold measuring and preparation tools.
A third can hold cutlery.
This may work better than combining every item into one crowded drawer.
Choose Multipurpose Tools
A few well-chosen utensils can replace several specialized gadgets.
For example, a versatile silicone spatula can handle scraping and some mixing tasks.
A suitable pair of tongs may be used for turning and serving food.
Avoid keeping multiple single-purpose tools that are rarely used.
The objective is not owning the fewest utensils possible.
It is keeping a practical set that supports normal cooking without occupying unnecessary space.
Key Takeaway: Small kitchens benefit from fewer duplicates, multipurpose tools, vertical storage for long utensils, and separate zones for different kitchen tasks.
How to Keep Kitchen Utensil Drawers Clean and Hygienic
A tidy drawer should also provide a clean storage environment.
Utensils often contact food directly, so they should be clean and dry before storage.
Put Away Only Clean, Dry Utensils
Moisture can collect inside closed drawers.
Storing wet utensils may contribute to unpleasant odors and damage certain wooden or metal items.
Allow washed utensils to dry before returning them.
This is especially relevant for wooden spoons and other wood-based tools.
Avoid placing damp dishcloths inside a utensil drawer.
Clean Drawer Organizers Regularly
Utensil compartments can collect crumbs, dust, and food residue.
Remove organizer trays periodically.
Wash or wipe them according to their material requirements.
Dry everything before putting the drawer back together.
Plastic organizers may have different cleaning restrictions from bamboo or wood organizers.
Follow the product instructions.
Keep Cleaning Products Separate
Do not store household cleaners, pesticides, or other chemicals in the same drawer as food-preparation utensils.
Accidental spills can contaminate cooking tools.
Cleaning supplies should have a dedicated storage location.
If chemicals spill onto utensils or food-contact equipment, follow the product’s safety instructions and clean or replace affected items as appropriate.
Protect Sharp Utensils
Sharp tools should be stored so they do not injure someone reaching into the drawer.
Use protective covers or dedicated compartments.
Inspect knife guards and organizers for damage.
Do not store sharp blades loose beneath other utensils.
For households with young children, keep dangerous cutting tools secured and out of reach.
Key Takeaway: Store utensils clean and dry, wash organizers periodically, separate chemicals from cooking tools, and secure sharp items.
Common Kitchen Utensil Drawer Organization Mistakes
An organizer can look attractive immediately after installation but fail during normal use.
These mistakes are worth avoiding.
Mistake 1: Buying Dividers Before Measuring
An organizer may be too wide, too long, or too tall for the drawer.
Always measure the usable interior and drawer clearance first.
Do not rely on the exterior cabinet dimensions.
Mistake 2: Keeping Too Many Duplicate Utensils
An overcrowded drawer becomes difficult to maintain.
Keep duplicates that serve a practical purpose.
Move rarely used extras to secondary storage.
A small amount of open space is useful.
Mistake 3: Using a Cutlery Tray for Long Cooking Tools
Standard cutlery trays are often designed for forks and spoons.
They may be too short for spatulas, ladles, and whisks.
Choose compartments that match the tools’ actual dimensions.
Mistake 4: Putting Frequently Used Tools at the Back
Everyday cooking tools should be easy to reach.
If the front compartments contain unused gadgets, the drawer layout does not reflect daily cooking.
Move frequently used items forward.
Mistake 5: Stacking Too Many Utensils
Deep piles hide smaller tools and create tangles.
Use wider compartments or relocate bulky items.
An organized drawer should allow you to remove one utensil without lifting several others.
Mistake 6: Ignoring Drawer Height
A utensil may fit inside the drawer but catch against the cabinet frame while closing.
Check vertical clearance.
Do not force the drawer shut when something is obstructing it.
Mistake 7: Storing Sharp Tools Loosely
Loose blades create injury risks.
Use proper guards, trays, or knife organizers.
Keep dangerous cutting tools secured when children can access the kitchen.
Mistake 8: Failing to Maintain the System
Even a well-organized drawer can become messy when items are returned to random positions.
Give each tool a consistent location.
Review the arrangement when new utensils are purchased.
Key Takeaway: Measure before buying organizers, avoid overcrowding, store sharp items securely, and place the most frequently used utensils where they are easiest to reach.
How to Keep a Kitchen Utensil Drawer Organized Long-Term
Organizing a drawer once is relatively simple.
Keeping it tidy requires small habits that become part of the normal kitchen routine.
Daily: Return Tools to Their Assigned Compartments
After washing and drying utensils, return them to the same locations.
Avoid dropping clean tools into the first available space.
A consistent arrangement reduces the likelihood of categories becoming mixed.
It also makes it easier to notice when an item is missing.
Weekly: Remove Misplaced Items
Spend a minute checking the drawer.
Move unrelated objects to their proper locations.
Look for tools that have shifted into the wrong compartments.
Straighten any organizers that have moved.
This brief check can prevent a larger mess from developing.
Monthly: Review the Drawer Layout
Check for new utensils, duplicate tools, and rarely used accessories.
Inspect organizers for crumbs and residue.
Clean when needed.
If a compartment repeatedly becomes overcrowded, adjust its size or move some items.
A useful drawer layout should change as cooking habits change.
When Buying a New Utensil: Assign It a Location
Before adding a new tool, decide where it belongs.
If the drawer is full, consider replacing an older tool or relocating something used less frequently.
Avoid treating the drawer as unlimited storage.
Giving new items a defined location prevents gradual clutter.
Key Takeaway: Consistent placement, brief weekly checks, periodic cleaning, and sensible decisions about new utensils will keep the drawer organized.
Kitchen Utensil Drawer Organization Checklist
Use this checklist after completing the arrangement.
- The drawer has been emptied and cleaned.
- Broken or unnecessary utensils have been removed.
- Everyday tools are stored in accessible positions.
- Similar utensils are grouped together.
- Small gadgets have separate compartments.
- Large utensils do not prevent the drawer from closing.
- Sharp tools have protective storage.
- Organizers fit the drawer without forcing the sides.
- Utensils are clean and dry before storage.
- The drawer opens and closes smoothly.
- Every item has an assigned location.
- There is enough room to add or remove utensils comfortably.
A drawer does not need to look perfectly symmetrical to work well.
Functionality matters more than creating a decorative arrangement.
Conclusion
Understanding how to organize a kitchen utensil drawer begins with simplifying what you store. Removing unnecessary tools, grouping similar items, and selecting compartments based on actual utensil dimensions can turn a crowded drawer into a practical part of the cooking area.
The most useful arrangement places everyday utensils within easy reach while keeping bulky and rarely used gadgets elsewhere. Adjustable dividers, modular bins, and nonslip liners can improve the layout, but an expensive organizer is not required.
For most kitchens, I recommend starting with the existing drawer and the utensils already owned. Measure the space, choose a simple layout, and test it during ordinary cooking before purchasing additional organizers.
A good utensil drawer should save time, reduce clutter, and make food preparation more comfortable. With occasional cleaning and consistent storage habits, the arrangement can remain useful long after the initial organizing session.
FAQs About Organizing Kitchen Utensil Drawers
What Is the Best Way to Organize a Kitchen Utensil Drawer?
The best method is to remove everything, sort utensils by purpose, and keep frequently used tools in accessible compartments.
Use adjustable dividers or small containers to separate long cooking utensils from smaller gadgets.
Avoid overcrowding and store large or rarely used tools elsewhere.
A practical drawer layout should make it easy to remove one utensil and return it without disturbing the rest.
How Do You Organize Kitchen Utensils Without a Drawer Organizer?
You can use shallow washable containers, small storage bins, or a nonslip drawer liner.
Group utensils according to size and purpose.
Keep long spatulas along one side and small preparation tools in a separate container.
Avoid stacking large quantities of utensils.
A simple arrangement works well when the drawer contains only regularly used tools.
Where Should Spatulas and Wooden Spoons Be Stored?
Spatulas and wooden spoons are convenient to keep in a drawer near the stove or main cooking area.
Use a long compartment that allows the tools to lie flat.
Arrange handles in the same direction when practical.
For a small drawer, a stable countertop utensil crock can provide an alternative.
Keep any countertop holder away from direct burner heat and excessive splashing.
What Is the Best Utensil Drawer Organizer?
An adjustable divider or modular tray system is often the most practical choice because it can accommodate different utensil shapes.
Expandable bamboo organizers work well when their compartment dimensions match the drawer.
Long cooking tools need larger sections than ordinary cutlery.
Measure the drawer before buying and choose an organizer that can be removed for cleaning.
How Do You Organize a Deep Kitchen Utensil Drawer?
Use removable long bins or adjustable dividers to create separate sections.
Place bulky tools in compartments large enough for their heads and handles.
Avoid stacking several layers of utensils because the lower items become difficult to reach.
A deep drawer can be useful for ladles, mashers, tongs, and other cooking tools that do not fit comfortably in shallow drawers.
How Do You Organize a Small Kitchen Drawer?
Keep only the essential utensils in the main drawer.
Use slim compartments for small tools and move oversized items to a countertop crock or another suitable storage location.
Avoid keeping unnecessary duplicates.
Store measuring tools and peelers together when practical, while giving long spatulas a separate section.
A smaller collection is usually easier to manage than an overcrowded drawer.
Is It Safe to Store Kitchen Knives in a Utensil Drawer?
Yes, if the knives are stored securely in an appropriate in-drawer knife organizer or with suitable blade guards.
Do not leave exposed knife blades loose among spatulas and other utensils.
Sharp edges can injure someone reaching into the drawer and may damage surrounding items.
For households with children, keep knives secured and out of reach using appropriate safety measures.
How Often Should You Clean a Kitchen Utensil Drawer?
Inspect the drawer regularly and clean it whenever crumbs, spills, or other residue appear.
A monthly check is a reasonable starting point for many households.
Remove organizer trays, clean the drawer interior, and allow everything to dry completely before replacing utensils.
Store only clean, dry cooking tools to reduce moisture buildup and unpleasant odors.




2 Comments