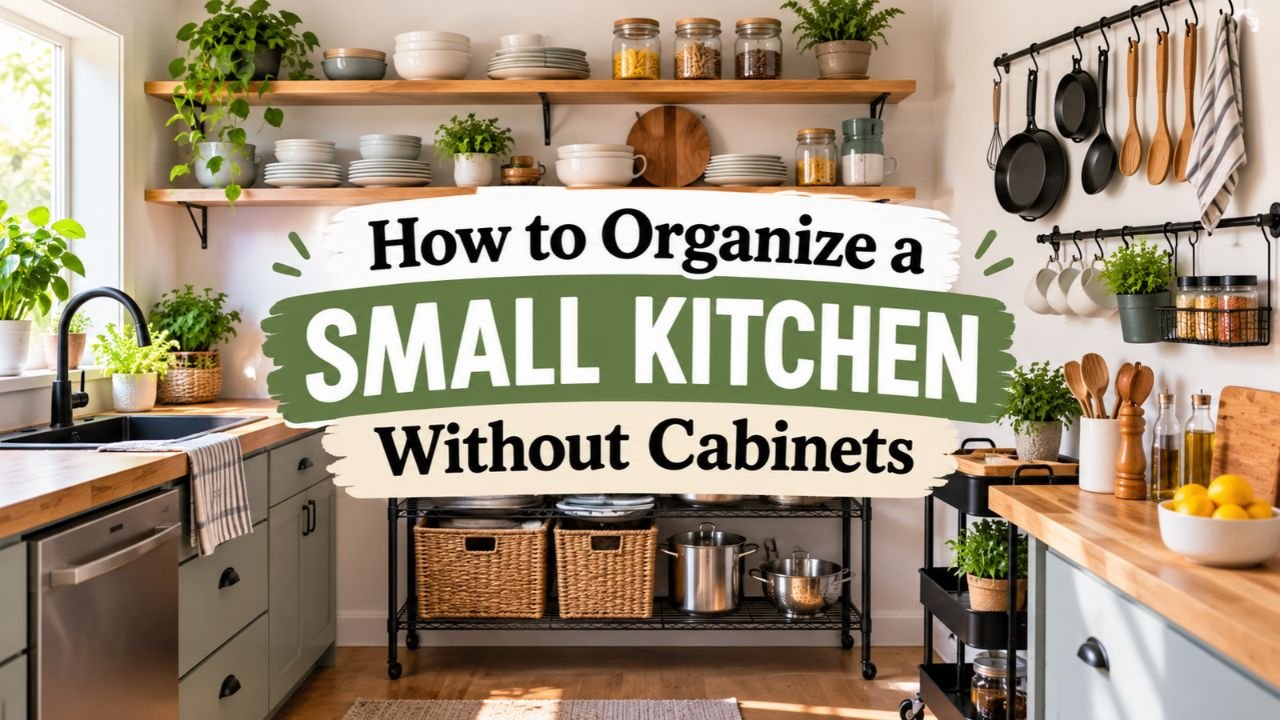
How to Organize a Small Kitchen Without Cabinets: 9 Practical Ways
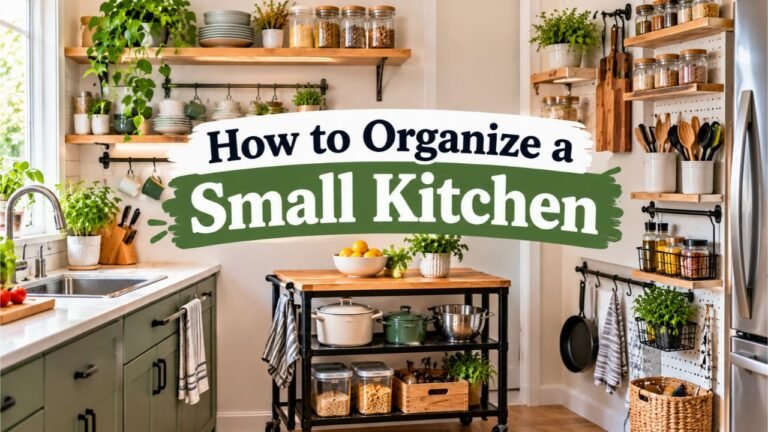
Setting up a compact cooking space that lacks built-in cupboards requires turning empty vertical walls, narrow floor gaps, and appliance sides into structured storage zones. By combining heavy-duty freestanding shelving units, rolling utility carts, wall-mounted pegboards, and ceiling or rail hooks, you can store cookware, dry groceries, and daily dishes neatly while keeping your limited countertops completely clear for meal preparation.
Living with nowhere to tuck away plates, skillets, and dry food quickly turns everyday cooking into a frustrating chore. When pots, spice jars, and cereal boxes pile up on the only available counter next to the sink, you lose your food prep surface, knock items onto the floor, and spend twice as long searching for a basic spatula or mixing bowl.
Creating dedicated storage zones off the counter immediately restores your workspace and cuts down daily cleanup time. A structured setup keeps heavy cast-iron cookware stable, protects dry pantry ingredients from stove heat and sink splashes, and lets you grab cooking tools with one hand while stirring a pan on the burner.
Compact kitchen footprints are especially common across American rental markets. According to a 2025 RentCafe analysis of U.S. apartment data, new studio apartments average just 457 square feet nationwide, while the National Kitchen and Bath Association reports that kitchens in smaller U.S. homes under 1,500 square feet average only 103 square feet.
What stood out to me during my research into compact apartment layouts is how much usable storage capacity sits completely empty between counter height and the ceiling. Knowing how to organize a small kitchen without cabinets comes down to treating your walls, door frames, and vertical corners as weight-bearing storage zones rather than plain drywall.
One common mistake that ruins open storage is stacking loose, mismatched food packages on open racks without containment bins. Because everything sits in plain view without cupboard doors to hide the mess, grouping small items inside matching opaque baskets or clear glass jars prevents the room from looking like a cluttered warehouse.
Below, you will find step-by-step methods for decluttering kitchen gear, choosing freestanding racks, mounting renter-friendly wall hooks, containing dry pantry goods, and organizing under-sink plumbing gaps so every item in your kitchen has a permanent home.
How to Prepare and Declutter a Small Kitchen Without Cabinets
Before buying a single shelf, hook, or storage bin, you must shrink the total volume of kitchen gear competing for space. When a kitchen has no cupboard doors to conceal extra clutter, every mug, pan, and food package sits out in the open or inside a visible basket. Storing unused gadgets only steals space from the tools you actually cook with every day.
Sorting Everyday Cookware From Rarely Used Kitchen Gadgets
Start by pulling every kitchen item out of boxes or off the counters and grouping them by function: baking pans, stovetop skillets, prep knives, drinking glasses, and dry food. Look closely at duplicates. A compact kitchen rarely needs four wooden spoons, three vegetable peelers, sixteen coffee mugs, or five mixing bowls of nearly identical size.
I recommend applying a strict single-purpose tool rule during this stage. Single-use gadgets like avocado slicers, strawberry hullers, electric quesadilla makers, and oversized roasting pans take up valuable shelf inches that a sharp 8-inch chef’s knife and a 10-inch cast-iron skillet can handle every day. Keep the versatile workhorses on hand and pack specialty holiday platters into a bedroom closet or under-bed storage bin.
| Kitchen Item Category | Keep in the Kitchen | Relocate or Donate |
| Pots and Pans | 10-inch skillet, 3-quart saucepan, 6-quart stockpot | Specialty paella pans, duplicate frying pans, woks |
| Prep Tools | Chef’s knife, paring knife, 2 cutting boards, 1 colander | Garlic presses, melon ballers, 4th and 5th spatulas |
| Dinnerware | 4 to 6 plates, bowls, and glasses (or 2 per resident) | Souvenir stadium cups, chipped mugs, formal china sets |
| Small Appliances | Daily coffee maker, toaster oven or air fryer | Bread machines, waffle irons, fondue pots, ice cream makers |
Measuring Narrow Floor Gaps and Vertical Wall Clearance
Once you pare down your belongings to daily essentials, pull out a tape measure and record every unused gap in the room. Check the exact width between the refrigerator and the adjacent wall, the vertical distance from the countertop to the ceiling, and the depth of the open space underneath the sink basin.
In my research, I found that many people overlook narrow vertical slots between 6 inches and 12 inches wide next to stoves or refrigerators. Recording these exact dimensions in inches—along with the height of your tallest cereal box or blender pitcher—prevents you from buying a rolling cart that blocks the oven door from swinging open.
Mapping Cooking Zones in a Cabinet-Free Kitchen Layout
Kitchen zoning means storing items right at the spot where you use them first. Even in a tiny room, dividing your footprint into three clear work zones stops you from walking back and forth while holding dripping utensils or hot pans:
- The Prep and Dry Pantry Zone: Position cutting boards, mixing bowls, knives, spices, and dry grains closest to your main stretch of open counter or rolling island.
- The Stovetop Cooking Zone: Keep skillets, saucepans, pot lids, cooking oils, and heat-resistant spatulas within arm’s reach of the burner.
- The Sink and Dishwashing Zone: Place your drying rack, dish soap, microfiber towels, daily plates, and drinking glasses right beside or directly above the sink basin.
Key Takeaway: Pare down duplicate kitchen tools first, measure every narrow gap in inches, and group your remaining items into prep, cooking, and washing zones before purchasing organizers.
How to Organize a Small Kitchen Without Cabinets Using Freestanding Furniture
When built-in woodwork is missing, freestanding furniture serves as the backbone of your storage system. The best pieces occupy a minimal floor footprint while climbing high toward the ceiling or rolling out of the way when you need floor clearance.
Adding Heavy-Duty Wire Shelving or a Tall Baker’s Rack
A tall baker’s rack or NSF-certified chrome wire shelving unit gives a cabinet-free kitchen the storage equivalent of a full pantry cupboard in just two to four square feet of floor space. Wire shelving works remarkably well in tight quarters because light passes right through the open metal grates, keeping a windowless galley kitchen from feeling boxed in.
From the manufacturer specifications I reviewed, standard heavy-duty wire shelving units with 1-inch diameter steel posts often support between 250 and 600 pounds per shelf when the weight is distributed evenly. That capacity lets you store a heavy microwave, a stand mixer, cast-iron Dutch ovens, and bulk flour canisters on a single unit without bowing the shelves.
Pro Tip: Purchase thin polypropylene shelf liners for wire racks so small spice jars, oil bottles, and narrow appliance feet sit flat without tipping through the metal ribs.
Using a Rolling Kitchen Island Cart for Prep Space and Pot Storage
If your kitchen lacks both cabinets and counter space, a rolling kitchen utility cart or mobile butcher-block island solves two problems at once. The top wood or stainless-steel surface acts as your primary chopping station, while the lower slatted shelves hold heavy skillets, mixing bowls, and small appliances.
Look for a cart measuring at least 34 to 36 inches high so it matches standard American counter height and saves your lower back during long chopping sessions. Make sure at least two of the caster wheels have sturdy foot brakes. Locking the wheels keeps the cart rock-steady while you knead dough or dice root vegetables, and unlocking them lets you roll the entire unit flat against a wall after dinner.
Repurposing Narrow Bookcases and Bar Carts for Dinnerware
You do not have to shop strictly in the kitchen aisle to store plates and pantry staples. A narrow wooden bookcase measuring 10 to 12 inches deep fits flush against a hallway wall or dining nook without blocking walkway traffic, and that shallow depth happens to be the exact size needed for standard 10.5-inch dinner plates.
In my view, a shallow bookcase beats deep shelving for food storage because cans and jars never get lost in a dark back row. You can stack dinner plates and soup bowls on the middle shelves at waist height, place cookbooks and dry pasta jars on the upper shelves, and tuck heavy stockpots into the bottom cubbies.
Sliding Ultra-Thin Rolling Carts Into Refrigerator Gaps
Have you ever checked that narrow gap of dead space between the side of your refrigerator and the kitchen wall? Most small kitchens have a 5-inch to 8-inch gap next to the fridge or stove to allow airflow and door clearance.
Sliding a slim pull-out pantry cart on smooth caster wheels into that slot creates an instant vertical spice and canned-good cabinet. Keep cooking oils, vinegar bottles, canned beans, and broth cartons inside the tiered guardrails, and simply roll the rack out by its handle whenever you start cooking.
Key Takeaway: Rely on vertical wire shelving, locking butcher-block carts, shallow 12-inch bookcases, and slim gap rollers to build cabinet-level storage without touching the walls.
How to Use Vertical Wall Space in a Small Kitchen Without Cabinets
Once your floor furniture is in place, look up. Your walls offer dozens of square feet of storage capacity right at eye level, keeping daily cooking tools off your workspace.
Installing Open Floating Shelves or Bracketed Wood Planks
If your lease or home ownership allows drilling into wall studs, wall-mounted open shelving is the closest direct replacement for upper kitchen cabinets. However, how you mount those shelves determines whether your dishes stay safe.
I strongly prefer L-bracket or heavy-duty steel triangle bracket shelves over hidden-rod “floating” shelves for a kitchen without cabinets. Hollow-wall floating shelves often sag when loaded with heavy stoneware plates, whereas metal brackets screwed directly into wood wall studs with 2.5-inch wood screws easily support heavy stacks of dinnerware and glass mason jars. Space your shelves 12 to 15 inches apart vertically so tall cereal canisters and blender pitchers slide in comfortably.
Mounting a Wall Pegboard for Skillets, Utensils, and Colanders
Made famous by Julia Child’s compact workspace, a wall-mounted pegboard turns any blank wall into an adjustable vertical tool chest. Whether you choose classic 1/4-inch perforated hardboard mounted on wood furring strips or interlocking steel pegboard panels, you can hang almost anything with a handle or rim:
- Frying pans and saucepans with hanging holes in the handles
- Mesh colanders and splatter screens
- Measuring cups and spoons grouped on metal split rings
- Wooden cutting boards with finger holes
- Ladles, whisks, and slotted turners
Helpful Insight: Trace the outline of your frying pans on the pegboard with a paint marker if you want every pot to return to its exact spot after washing, or leave the board unmarked so you can rearrange the locking metal peg hooks whenever you buy a new pan.
Hanging Rail Systems and S-Hooks Above the Backsplash
If a full pegboard feels too large for your space, install a single stainless-steel wall rail across the backsplash area between your sink and stove. Paired with simple metal S-hooks and small hanging wire caddies, a single 24-inch rail clears an entire drawer’s worth of clutter off your counter.
You can hang coffee mugs by their handles, suspend a perforated cylinder to air-dry wet forks and spoons, and hook your oven mitts right beside the range. Because the rail sits just below eye level over the counter, water drips from freshly rinsed utensils fall straight onto the counter or sink drainboard rather than the floor.
Attaching Magnetic Knife Strips and Refrigerator Side Racks
Never waste precious counter inches on a bulky wooden knife block in a cabinet-free kitchen. Mounting a 12-inch or 18-inch magnetic knife bar to the wall keeps sharp blades visible, sanitary, and out of overcrowded utensil crocks. Metal kitchen shears, vegetable peelers, and stainless-steel spice tins also snap right onto the magnet.
At the same time, treat both steel sides of your refrigerator as giant magnetic bulletin boards. Heavy-duty magnetic refrigerator caddy racks attach instantly without tools or adhesives, holding up to 10 to 15 pounds of paper towel rolls, aluminum foil boxes, plastic wrap, and daily cooking oils right on the side of the fridge.
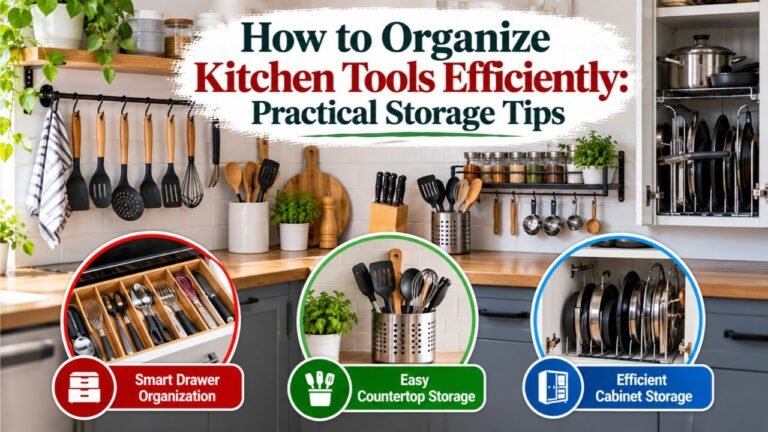
Key Takeaway: Anchor bracketed shelves into wall studs for heavy dishes, hang skillets on a pegboard or backsplash rail, and attach magnetic racks to your refrigerator sides to free up counter space.
Renter-Friendly Ways to Store Kitchen Items Without Drilling Walls
Renters in older apartments or studio efficiencies often face two hurdles at once: tiny kitchens without cabinets and strict lease agreements that forbid drilling holes into plaster or tile. Fortunately, several high-capacity storage setups rely on tension, gravity, and removable adhesives instead of power drills.
| Renter Storage Method | Average Weight Capacity | Best Kitchen Items to Store |
| Over-the-Sink Drying Rack | 30 to 60 lbs | Wet plates, bowls, silverware, sponges, dish soap, cutting boards |
| Spring Tension Rods | 3 to 10 lbs | Spray bottles, paper towels, lightweight S-hooks, dish towels, curtain dividers |
| Over-the-Door Pantry Rack | 25 to 50 lbs | Spice jars, canned soup, pasta boxes, oils, snack bars, foil rolls |
| Adhesive Wall Hooks | 2 to 7.5 lbs per hook | Oven mitts, measuring spoons, plastic colanders, coffee mugs, hand towels |
| Freestanding Counter Risers | 15 to 35 lbs | Coffee mugs, tea tins, small plates, toaster oven clearance |
Setting Up an Over-the-Sink Two-Tier Dish Drying Rack
A traditional flat dish drainer steals nearly two square feet of counter space right next to your faucet. Swapping it for a straddle-style over-the-sink drying rack moves all your dish storage into the empty air directly above the basin.
As dishes dry, water drips straight down into the sink bowl. In a kitchen with no upper cupboards, you do not even need to put those daily plates and glasses away—the two-tier stainless-steel frame acts as your permanent dish cabinet, complete with side holsters for knives, cutting boards, and liquid dish soap.
Using Heavy-Duty Tension Rods and Adhesive Hooks Safely
Spring-loaded tension rods wedge tightly between two vertical surfaces using internal spring pressure and rubber end caps. If you have a recessed window frame above the sink, a doorway alcove, or open bookcase cubbies, wedging a metal tension rod across the gap gives you an instant hanging bar for S-hooks, measuring cups, and kitchen hand towels.
When using damage-free adhesive strips and hooks, pay strict attention to surface prep and weight ratings. Wipe the tile or painted drywall with isopropyl rubbing alcohol first to strip away microscopic cooking grease; otherwise, steam and oil residue from the stove will cause the adhesive pad to peel off the wall.
Safety Tip: Never hang heavy cast-iron skillets, ceramic Dutch ovens, or breakable glass jars from adhesive strips or tension rods. Limit adhesive hooks to lightweight tools under 5 pounds, such as wire whisks, aluminum measuring cups, pot holders, and plastic strainers.
Hanging Over-the-Door Pantry Organizers on Kitchen or Closet Doors
If your kitchen has a hinged entry door, a utility closet door, or a nearby hallway door, the back of that panel can hold an entire grocery store aisle of dry food. Choose a full-length over-the-door metal pantry rack that hooks over the top door edge and secures at the bottom with a stabilizing bracket so baskets do not swing and bang when the door moves.
With six to eight adjustable wire tiers, a single door rack holds dozens of spice bottles, pasta boxes, canned tomatoes, peanut butter jars, and snack pouches without occupying a single inch of floor or counter space.
Key Takeaway: Renters can build vertical storage without drilling by placing a two-tier drying rack over the sink, hanging a multi-tier pantry rack over a door, and securing lightweight tools with alcohol-prepped adhesive hooks.
How to Store Dry Pantry Food Without Kitchen Cabinets
Storing dry groceries in a kitchen without cabinets presents three distinct challenges: visual clutter from brightly colored cardboard boxes, accelerated spoiling from direct sunlight and stove heat, and exposure to kitchen pests. A smart open-pantry setup solves all three issues.
Decanting Dry Goods Into Airtight Glass Jars and Clear Canisters
Cardboard cereal boxes, half-empty flour bags, and crinkled pasta packages look messy on open shelves and invite pantry moths. Transferring staple ingredients—like rice, oats, all-purpose flour, sugar, coffee beans, and dried lentils—into uniform airtight glass mason jars or BPA-free square acrylic canisters immediately cleans up the look of your shelves.
Square or rectangular stackable canisters save roughly 15 to 20 percent more shelf space than round jars because they sit flush side-by-side without leaving wasted circular gaps between containers. Use a simple waterproof chalk marker or label maker to write the contents and expiration date on the bottom or back of each jar.
Grouping Snacks and Canned Goods in Opaque Baskets
You do not want to decant every single food item you buy. Canned soups, tuna pouches, granola bars, taco seasoning packets, and instant noodles need to stay in their original factory packaging.
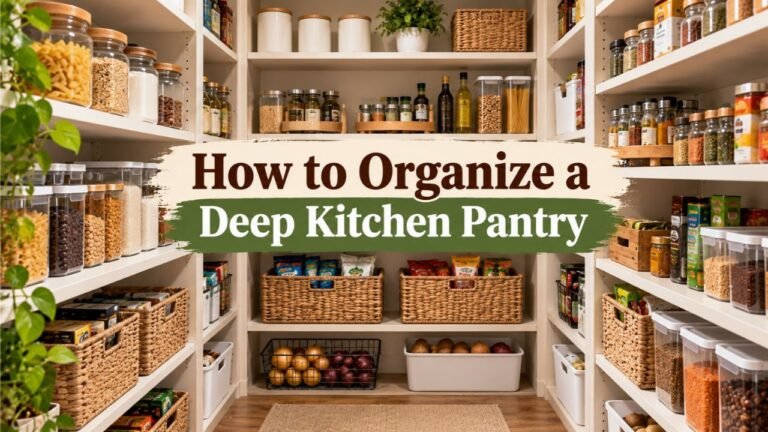
To stop those colorful labels from making your open shelves look chaotic, group them inside matching opaque storage bins, woven seagrass baskets, or matte plastic tubs. Dedicate one bin to “Canned Goods,” one to “Breakfast and Snacks,” and another to “Baking Supplies”. When everything sits inside matching containers, your open wire rack or bookcase reads as three calm, uniform boxes to the eye rather than forty tiny packages.
Protecting Open Pantry Food From Heat, Light, and Pests
Because your food is not shielded behind solid wood cabinet doors, placement matters for food safety and shelf life. Cooking oils, spices, nuts, and whole-grain flours turn rancid or lose flavor quickly when exposed to heat rising off a range or bright sunlight streaming through a window.
Keep your food baskets and glass jars on the lower and middle shelves of a bookcase positioned away from the stove and dishwasher, where temperatures stay cooler and more stable. Reserve the top shelf near the ceiling—where heat rises and lingers—for paper towels, extra dish sponges, or aluminum baking sheets.
Key Takeaway: Decant loose grains into square airtight canisters, hide packaged snacks inside matching opaque bins, and store food on lower shelves away from stove heat and direct window sunlight.
How to Organize Pots, Pans, and Plates in a Cabinetless Kitchen
Heavy cookware and breakable dinnerware are often the hardest items to place when you lack deep base cupboards and overhead dish cabinets. Storing them vertically and separating lids from pots keeps your shelves tidy and prevents chipped plates.
Stacking Skillets Vertically With Heavy-Duty Metal Pan Organizers
Nesting five frying pans flat inside one another forces you to lift four heavy pans with two hands just to grab the bottom skillet. Instead, place a vertical cast-iron pan organizer rack on the bottom shelf of your freestanding utility cart or wire rack.
Positioned vertically or on tiered horizontal slots, each skillet, griddle, and saucepan slides out independently like a file folder. Always place your heaviest cookware—such as enameled cast-iron Dutch ovens and stainless stockpots—on the lowest shelf within 12 inches of the floor. Keeping heavy weight low prevents top-heavy freestanding shelves from tipping forward and protects your shoulders from lifting heavy metal above chest height.
Corraling Pot Lids and Cutting Boards in Upright Wire Dividers
Loose glass pot lids with round knobs refuse to stack flat and constantly slide off open shelves. Solve this by placing an upright wire bakeware divider or even an inexpensive metal office file sorter on your shelf.
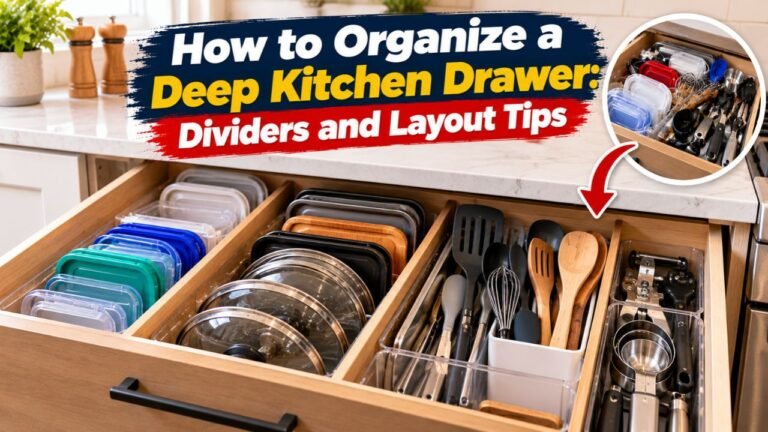
Slide pot lids, rimmed baking sheets, muffin tins, cooling racks, and cutting boards vertically into the narrow wire slots. Everything stands upright in less than 10 inches of horizontal shelf space, and you can pull out a single lid without causing a noisy metal avalanche.
Preventing Dust on Open-Shelf Dishes and Glassware
One common concern people have when organizing dishes without cabinets is airborne kitchen grease and dust settling on open stacks of plates. In my research, I found two practical habits that solve this completely:
- Keep only a small rotation of daily dishes on open shelves: If a two-person household keeps just four dinner plates, four bowls, and four glasses on the shelf, every single piece gets washed and rotated every 24 to 48 hours, leaving zero time for dust to accumulate.
- Store glasses and mugs upside down: Placing drinking glasses, wine glasses, and coffee mugs rim-down on a clean washable shelf liner prevents airborne dust from settling inside the cup. For occasional serving platters stored on high shelves, slip them inside clear zippered vinyl china storage cases or cover the stack with a clean linen tea towel.
Key Takeaway: Store heavy skillets on lower shelves using vertical pan racks, stand pot lids upright in wire dividers, and turn drinking glasses rim-down on washable liners to keep dust out.
Maximizing Under-Sink Storage and Countertop Corners
Even a tiny apartment kitchen without wall cabinets usually has a small enclosure or open pipe area underneath the sink basin, along with a few square feet of counter around the faucet. Making full use of these tight zones keeps cleaning chemicals away from your food storage.
Working Around Drain Pipes With Expandable Under-Sink Racks
The space directly under the kitchen sink is awkward because the vertical drain tailpiece and curved P-trap pipe cut right through the center of the area. If you just toss bottles on the floor under the sink, you waste all the vertical air space above the bottles.
Use an expandable under-sink pipe shelf fitted with removable slatted panels. You simply remove the middle plastic or metal slats where the curved P-trap drops down, allowing the two-tier frame to wrap neatly around the plumbing. Pair it with two-tier sliding wire pull-out drawers on the left and right sides so you can slide out dish detergent pods, scrub brushes, and trash bag rolls without kneeling on the kitchen floor.
Keep in Mind: If the area underneath your sink is completely open to the room with no doors, hang a washable fabric sink skirt using a tension rod or hook-and-loop fastener tape along the underside lip of the sink basin to hide the plumbing pipes, trash can, and cleaning buckets from view.
Using Waterproof Bins to Prevent Plumbing Leak Damage
Moisture and condensation are constant risks under a sink. Never store cardboard boxes, bulk paper towel rolls, or dry food underneath plumbing lines. Instead, place all cleaning sprays, sponges, and dishwasher tablets inside molded plastic caddies or waterproof polypropylene bins. If a supply line or drain fitting ever develops a slow drip, the plastic bin catches the water or shields your supplies while making it easy to lift everything out in ten seconds for a plumber.
Adding Corner Tiered Risers and Lazy Susans Without Crowding Counters
While your goal is keeping at least 70 percent of your countertop completely clear for food prep, the deep back corners of a counter are hard to reach for chopping anyway. Tucking a two-tier bamboo corner shelf riser or a 10-inch stainless-steel Lazy Susan turntable into a dead corner lets you stack everyday cooking oil, salt and pepper grinders, and a utensil crock vertically in a single compact footprint.
Key Takeaway: Wrap expandable shelving around under-sink drain pipes, contain cleaning supplies in waterproof plastic bins, and hide open under-sink plumbing behind a simple tension-rod fabric curtain.
5 Steps to Set Up and Maintain Your Cabinet-Free Kitchen
Putting all these pieces together works best when you follow a logical installation sequence rather than buying bins at random. Follow these five steps to build a streamlined kitchen layout in a single afternoon:
- Clear the Room and Declutter Ruthlessly: Remove everything from your counters and floor. Box up duplicate utensils, chipped mugs, and single-use appliances so only daily cooking essentials remain.
- Position Your Primary Freestanding Storage Unit: Set up your tall wire shelving rack, baker’s rack, or shallow bookcase first. Anchor tall units to the wall if possible, and load your heaviest appliances and cast-iron pots onto the bottom two shelves for stability.
- Install Over-the-Sink and Wall-Mounted Hardware: Place your two-tier over-the-sink dish rack over the basin, stick magnetic racks to the sides of your refrigerator, and mount your wall pegboard, backsplash rail, or over-the-door pantry rack.
- Decant Dry Goods and Label Opaque Bins: Pour loose grains and flours into clear airtight canisters, group packaged foods by category inside matching opaque baskets, and arrange them at eye and waist level on your shelves.
- Run a 5-Minute Nightly Reset: Because open shelving shows messes immediately, spend five minutes after dinner wiping down the counter, putting clean dry tools back on their wall hooks, and returning spice jars to their designated basket.
Common Mistakes to Avoid When Organizing Without Cabinets
Even great storage racks fail when loaded poorly. Watch out for these common pitfalls as you set up your space:
- Leaving Everything in Original Cardboard Packaging: Half-open cereal boxes, torn flour bags, and bright cracker boxes create visual chaos on open shelves and attract insects. Always use clear canisters or uniform baskets.
- Placing Heavy Items Above Eye Level: Storing a 12-pound cast-iron Dutch oven or heavy glass blender pitcher on a high shelf makes freestanding racks top-heavy and creates a serious drop hazard when your hands are wet or greasy.
- Blocking Airflow Around the Refrigerator: Pushing solid wood furniture tight against refrigerator coils traps heat and forces the compressor to work harder. Leave at least 1 to 2 inches of breathing room or use open-wire rolling carts next to the fridge.
- Buying Organizers Before Measuring: Ordering an over-the-sink rack without measuring the height of your faucet spout or low window valence often results in a frame that will not fit over the basin.
- Hanging Heavy Metal Near the Stove With Weak Adhesives: Steam and rising heat from boiled water soften cheap foam adhesive tape. Use mechanical screws into studs, tension systems, or magnetic fridge racks for anything heavy.
Conclusion
Figuring out how to organize a small kitchen without cabinets is all about trading missing wooden cupboards for vertical wall systems, multi-functional freestanding racks, and disciplined container grouping. When every square foot of wall height, door space, and narrow appliance gap is put to work, even a tiny studio kitchenette can hold a complete set of cookware, dishes, and dry groceries without sacrificing prep space.
Start by trimming down excess kitchen gadgets so you only store what you genuinely cook with each week. Combine a sturdy vertical wire rack or rolling butcher-block cart for heavy pots with an over-the-sink drying rack, magnetic refrigerator caddies, and matching opaque bins to calm visual clutter.
I recommend measuring your narrowest floor gaps and above-sink clearance today before ordering a single rack or basket. Once you give every skillet, plate, and pantry jar a dedicated vertical home off the countertop, cooking in a compact kitchen feels faster, cleaner, and far more enjoyable.
FAQs About Organizing a Small Kitchen Without Cabinets
How do I hide kitchen clutter if I only have open shelves?
Group small, visually busy items inside matching opaque containers such as woven baskets, matte plastic bins, or wooden crates. If you want to conceal an entire shelving unit or under-sink area, mount a light tension rod across the front frame of the bookcase or below the sink lip and hang a washable linen café curtain to create the look of a closed cupboard.
Where should I put dishes and glasses if I have no kitchen cabinets?
The most space-saving spot for daily plates, bowls, and glasses is a two-tier over-the-sink dish drying rack that straddles your sink basin. Dishes air-dry directly into the sink and stay stored on the rack until your next meal. Alternatively, stack plates on the middle shelf of a 12-inch-deep bookcase or wire rack and place glasses rim-down on a washable shelf liner.
How can I store heavy pots and pans without lower cabinets?
Store heavy cast-iron skillets, Dutch ovens, and stockpots on the bottom shelf of a freestanding wire shelving unit or rolling butcher-block cart so the weight stays close to the floor. Use a vertical metal pan divider so you can slide individual skillets out without lifting a heavy stack, or hang lighter saucepans on a wall-mounted pegboard anchored into wood studs.
How do I keep insects and mice out of food in a cabinetless kitchen?
Never leave opened cardboard boxes, paper flour sacks, or plastic chip bags exposed on open racks. Transfer dry goods like flour, sugar, rice, cereal, and pasta into hard-sided glass mason jars with metal screw lids or thick, airtight BPA-free plastic canisters with silicone gaskets. Hard glass and thick sealed plastic block pantry moths and rodents from smelling or chewing through packaging.
Where can I put a microwave in a tiny kitchen with no counter or cabinet space?
Take the microwave off the main counter by placing it at waist height on a heavy-duty NSF-certified wire shelving rack, a tall metal baker’s rack, or the top shelf of a sturdy rolling kitchen island cart. You can also place a compact microwave on top of a low apartment-sized refrigerator as long as the unit sits flat and remains at a safe shoulder height or lower for lifting hot bowls.
What is the cheapest way to add storage to a kitchen with no cupboards?
The most budget-friendly setup combines a freestanding 4-tier steel wire shelving rack, an over-the-door pantry organizer, and a few packs of S-hooks paired with tension rods or a wall rail. Together, these three low-cost additions hold bulky appliances, canned pantry foods, and hanging cooking utensils without requiring expensive furniture or remodeling work.