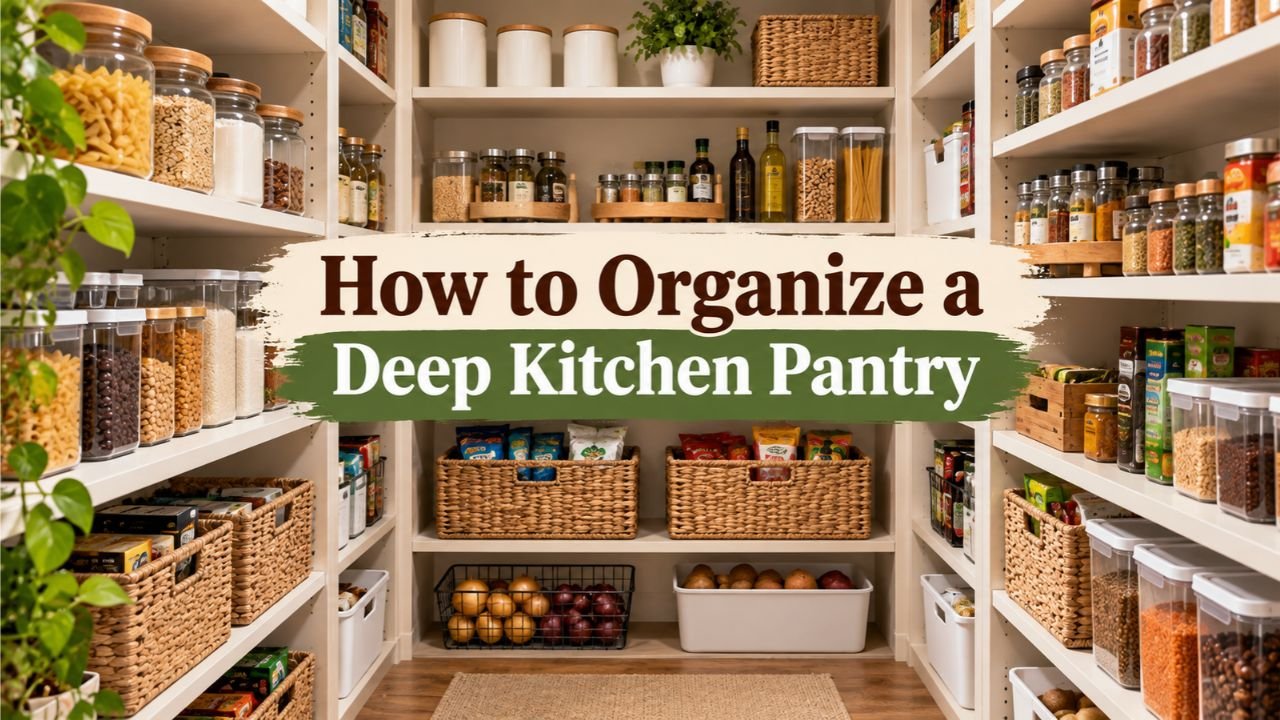
How to Organize a Deep Kitchen Pantry for Easy Access
A deep kitchen pantry is easiest to organize when groceries are grouped by category, frequently used items stay within reach, and products stored at the back can be brought forward without moving everything in front. Start by removing clutter, measuring the shelves, and using pull-out bins, shelf risers, and turntables where they improve access.
Deep pantry shelves provide generous storage, but their extra depth creates a frustrating problem. Cans disappear behind cereal boxes, snack packets get buried under newer groceries, and ingredients sometimes remain forgotten until their quality deteriorates.
A thoughtful storage arrangement makes groceries easier to find, reduces duplicate purchases, and keeps food preparation more organized. Instead of searching behind several containers, you can see what is available and retrieve ingredients without disturbing unrelated products.
According to ReFED’s estimates, American households generated 23.5 million tons of surplus food in 2024. Not all of that waste came from pantry storage, but keeping shelf-stable ingredients visible and rotating older purchases are practical ways to reduce forgotten food at home.
The challenge with how to organize a deep kitchen pantry is that ordinary shelf organization techniques do not always work. Placing products in neat rows may look attractive initially, but items behind the first row can remain difficult to see and reach.
What stood out to me during the research was that accessibility matters more than matching containers. A simple bin that brings groceries forward can be more useful than expensive storage jars arranged several rows deep.
The process below covers clearing shelves, measuring storage space, creating food zones, choosing suitable organizers, arranging deep corners, and maintaining an organized pantry. These steps will give you a practical setup that works for daily cooking rather than only looking attractive after cleaning.
Read More: how to organize kitchen utensil drawer
How to Organize a Deep Kitchen Pantry Step by Step
The best starting point is to organize the food before purchasing storage accessories.
A deep pantry becomes easier to manage when every category has a designated location and the back of each shelf remains accessible.
Step 1: Empty the Pantry and Remove Unnecessary Items
Start by removing food, containers, and other stored items from the pantry.
For a large walk-in pantry, work on one section at a time so the kitchen does not become overcrowded.
Place everything on a clean countertop or table.
Group similar products together, such as:
- Canned vegetables, soups, and beans
- Pasta, rice, oats, and other grains
- Breakfast foods and cereals
- Snacks and packaged foods
- Baking ingredients
- Sauces, oils, and condiments
- Extra groceries and bulk purchases
Check every package for damage, visible spoilage, or signs of insects.
Discard leaking, bulging, or severely damaged canned goods. Inspect older packages before deciding to keep them.
A passed “Best if Used By” date does not automatically make a shelf-stable food unsafe. USDA guidance explains that this label generally indicates quality rather than safety, with special rules applying to products such as infant formula.
Remove empty boxes, duplicate containers, and products that do not belong in food storage.
If unopened food is still suitable for donation and unlikely to be used, consider donating it to a local food pantry that accepts the product.
Once the shelves are empty, vacuum crumbs from corners and wipe the surfaces with an appropriate cleaner.
Allow everything to dry before replacing food.
Step 2: Measure the Depth, Width, and Height of Every Shelf
Measuring is necessary because deep shelves may not accommodate standard organizers.
Use a measuring tape to record the usable dimensions.
Measure the shelf depth from the front edge to the back wall.
Next, measure the available width and the vertical distance between shelves.
Also check:
- Door hinges or trim that reduce the opening width
- Shelf brackets that interfere with containers
- Clearance needed to lift bins from upper shelves
- Space available in front of the pantry for pulling out organizers
For example, a shelf measuring 20 inches deep may seem suitable for a 20-inch bin. But the bin could catch on the pantry door frame or be difficult to lift when filled.
The container needs enough clearance to move comfortably through the actual opening.
I recommend measuring each shelf separately rather than assuming the entire pantry has identical dimensions.
Step 3: Divide Groceries Into Everyday and Backup Items
After sorting the food, identify which products you use frequently.
Everyday groceries should remain easy to reach.
Items used occasionally can occupy secondary storage areas, while backup purchases can be placed farther back if they remain accessible.
Consider three groups.
Everyday foods: Breakfast cereal, oatmeal, rice, commonly used pasta, coffee, snacks, and cooking ingredients.
Occasional foods: Baking decorations, specialty sauces, seasonal ingredients, and less frequently used pantry products.
Backup supplies: Extra unopened cereal boxes, canned foods, bulk rice, additional pasta, and replacement packages.
This system prevents rarely used items from occupying the most convenient shelf positions.
The back of a deep shelf works best for clearly identified backup products rather than unrelated groceries.
For example, place an unopened replacement package of oats directly behind the oats currently in use.
When the front package is finished, the replacement is already in the correct location.
Step 4: Assign a Purpose to Each Shelf
A shelf-by-shelf plan makes the pantry more predictable.
Frequently used products generally belong between waist and eye level.
Heavier items should remain on lower shelves where they can be lifted without reaching overhead.
The following layout works as a starting point for a tall kitchen pantry.
| Pantry Area | Recommended Items | Reason |
| Top shelves | Seasonal baking supplies, lightweight extras, rarely used items | Keeps occasional products out of prime storage |
| Eye-level shelves | Breakfast foods, snacks, everyday ingredients | Easy to see and retrieve |
| Middle shelves | Pasta, rice, canned foods, cooking ingredients | Convenient for frequent meal preparation |
| Lower shelves | Heavy bulk containers, bottled drinks, large packages | Reduces overhead lifting |
| Back of accessible shelves | Clearly labeled backup groceries | Uses extra depth without hiding unrelated products |
| Pantry door | Lightweight spices, packets, small snacks | Frees shelf space when door clearance permits |
Adjust the arrangement according to the height of the person using the pantry most frequently.
A product stored at eye level for one adult may be difficult for another person to reach.
The objective is to assign the most convenient space to products used most often.
Step 5: Choose Organizers for the Deepest Areas
Once the shelves have assigned purposes, choose organizers for the specific storage problems.
Different products benefit from different solutions.
Long bins are practical for packaged snacks and small boxes.
Turntables work well for bottles and jars.
Tiered risers improve the visibility of canned foods.
Pull-out drawers can provide access to the full depth of fixed shelves.
Avoid buying every organizer style before testing the pantry layout.
I would start with two or three problem areas, such as a deep canned-food shelf and a crowded snack section.
After testing those, add more storage accessories only where necessary.
Step 6: Label Containers and Rotate Older Food Forward
Labels become more useful as shelf depth increases.
A bin may hide its contents when viewed from the front, even if the container is transparent.
Place labels where they remain visible without removing the bin.
Use simple category names such as “Pasta,” “Baking,” “Snacks,” or “Extra Cans.”
For dry goods transferred into storage containers, include the product name and relevant storage information.
Keep the original package information or record cooking directions, allergen details, and the manufacturer’s quality date.
Arrange identical products so those with earlier dates are used first.
This method is commonly called first in, first out (FIFO).
Step 7: Test the Layout Before Finalizing It
After returning groceries to their assigned places, test the pantry as if you were preparing a meal.
Try retrieving pasta, canned tomatoes, and a spice container.
Check that each item can be removed without unloading unrelated products.
Pull the storage bins forward while they are filled.
Rotate turntables to confirm that bottles do not strike neighboring containers.
Make sure taller packages do not block items behind them.
If an organizer becomes difficult to use when full, choose a smaller one or reduce its contents.
An organized pantry should remain convenient during ordinary cooking, not only when everything is perfectly arranged.
Key Takeaway: Empty and sort the pantry first, measure the usable space, assign shelf zones, and select organizers that bring hidden groceries within reach.
Best Organizers for Deep Kitchen Pantry Shelves
Deep shelves need storage accessories that improve both visibility and access.
The following options solve different problems, so they should be chosen according to the items being stored.
Long, Narrow Pull-Out Storage Bins
Long bins are one of the most practical solutions for deep pantry shelves.
They create a removable storage lane that can hold several related products.
Instead of reaching behind other groceries, pull the entire bin forward.
This works well for snack packets, granola bars, baking supplies, tea boxes, and smaller pantry packages.
Clear bins make contents easier to identify, while handled bins provide a convenient grip.
Choose a bin that is narrow enough to move through the pantry opening.
Avoid filling one large bin with heavy cans or glass bottles if the weight makes it difficult to remove.
For heavier products, use containers with suitable load ratings or consider a properly installed pull-out shelf.
Lazy Susans for Bottles and Jars
A lazy Susan, also called a turntable organizer, is a rotating platform used to access items arranged around its surface.
It works well for oils, vinegars, sauces, spreads, and small condiment jars.
Without a turntable, bottles at the back of a deep shelf may be difficult to reach.
A rotating organizer brings them to the front with a simple turn.
For tall containers, choose a turntable with a raised rim to reduce the chance of bottles sliding off.
Measure the diameter carefully.
A circular turntable can leave unused space in the corners of a rectangular shelf, so it is not always the best choice for boxed foods.
Tiered Shelf Risers for Canned Foods
Tiered shelf risers raise the back rows of products above the front rows.
They are useful for canned vegetables, soup cans, spice jars, and small food containers.
For example, three rows of cans placed directly on a deep shelf may hide most labels.
A tiered organizer raises the rear cans so their labels remain visible.
Yet visibility is only part of the solution.
If the highest row remains beyond comfortable reach, the riser may not solve the problem.
Use risers on shelves where you can access the back row safely or pair them with an appropriate pull-out arrangement.
Full-Extension Pull-Out Pantry Drawers
Pull-out drawers provide access to items stored near the back of a deep cabinet.
A full-extension drawer is designed to travel far enough that most or all of its contents become accessible.
These organizers are useful for fixed deep shelves that repeatedly hide groceries.
They may hold canned food, pantry containers, or other items within their rated capacity.
Installation requires careful measurement of the cabinet opening, available clearance, and mounting surfaces.
Check the manufacturer’s weight rating and hardware requirements.
A heavily loaded pull-out drawer must be supported correctly. Poor installation can damage cabinetry or create a tipping hazard.
For renters, removable bins may be more practical than permanent hardware.
Over-the-Door Pantry Organizers
A pantry door can provide additional storage for lightweight products.
Suitable items include spice packets, seasoning jars, snack pouches, and small food packages.
An over-the-door organizer is most useful when shelf space is limited.
Before installation, close the door with the shelves loaded and measure the available clearance.
A rack that extends too far inward may collide with deep shelf contents.
Also check the door’s strength and the organizer’s mounting instructions.
Avoid overloading the door with heavy bottles or glass jars.
Key Takeaway: Use long bins for grouped packets, turntables for bottles, risers for visible canned-food rows, and pull-out drawers where the rear of a shelf remains difficult to access.
How to Arrange Different Foods on Deep Pantry Shelves
Grouping food by type is useful, but packaging size and frequency of use also influence placement.
An arrangement should let you retrieve one category without disturbing another.
Canned Foods and Glass Jars
Place canned goods together, preferably on sturdy middle or lower shelves.
Group identical products in front-to-back rows.
For example, canned beans can occupy one row while tomato products occupy another.
Keep the products with earlier quality dates toward the front.
Avoid stacking cans so high that they become unstable.
If using a tiered organizer, confirm that the back row remains reachable.
Large glass jars should stay on stable shelves where they cannot easily be knocked over.
Pasta, Rice, Flour, and Other Dry Goods
Dry ingredients work well in airtight containers that protect them from moisture and pantry pests.
Use containers suited to the amount normally purchased.
Tall containers may be practical for spaghetti, while wider containers suit flour, oats, and rice.
Check that each container fits below the shelf above and can be removed without tilting excessively.
If using matching containers, choose them for capacity and handling rather than appearance alone.
There is no need to remove every dry product from its original packaging.
A sealed factory package stored inside a labeled bin may already meet your organization needs.
Snacks, Breakfast Foods, and Small Packets
Snack packaging often creates clutter because packets vary in shape and size.
Long bins work well for granola bars, crackers, dried fruit, and similar foods.
Breakfast foods should stay near one another when they are used together.
For example, cereal, oatmeal, and breakfast bars may share an accessible shelf.
Store children’s snacks at an appropriate height when independent access is intended.
Avoid placing heavy containers directly above areas where children regularly reach.
Baking Ingredients and Specialty Foods
Baking ingredients often include a mixture of large containers and very small packages.
Keep flour, sugar, and commonly used baking ingredients in one designated area.
Use a smaller bin for baking powder, baking soda, extracts, chocolate chips, and decorating supplies.
Store ingredients with strong odors in properly sealed containers.
Keep food allergens clearly identified.
If someone in the household has a diagnosed food allergy, dedicated or carefully separated containers may be necessary to prevent allergen cross-contact.
Key Takeaway: Organize each food group by package shape and how often it is used. Give small packets removable bins, keep canned food visible, and store dry goods in suitable sealed containers.
How to Organize Narrow, Deep, and Corner Pantry Shelves
Not every deep pantry has a wide rectangular shelf layout.
Narrow cabinets and corner spaces create additional access problems.
Organizing a Narrow Pantry With Deep Shelves
In a narrow pantry, wide baskets can occupy most of the shelf opening.
This leaves little room for moving products.
Choose narrow bins that run from front to back.
Assign one food category to each bin.
For example, one lane can hold pasta, another packaged snacks, and another baking ingredients.
Avoid placing two unrelated bins directly behind one another.
The front bin would need to be removed every time you wanted something from the rear.
If the cabinet has a narrow door opening, verify that every bin can pass through it.
For very narrow cabinets, a properly designed slide-out rack may be worth considering.
Organizing Deep Corner Pantry Shelves
Corner shelves often contain spaces that are difficult to see or reach.
A turntable can work well in some corners, especially for bottles and jars.
For larger products, use labeled bins that can be removed individually.
Avoid storing loose packages deep inside a corner where they become impossible to inspect.
If shelves form an L-shape, organize each side as a separate storage area.
Reserve the deepest corner for lightweight backup supplies that can be retrieved safely.
Do not place heavy appliances or glass containers in a corner that requires awkward lifting.
Organizing a Tall Pantry Cabinet
A tall pantry has two challenges: shelf depth and vertical reach.
Store everyday products in the middle section.
Place heavy packages on lower shelves and lightweight occasional items higher up.
Use a stable step stool when accessing high shelves.
Do not stand on pantry shelves or climb cabinet structures.
If frequently used products are stored above comfortable reach, rearrange the pantry instead of relying on repeated overhead stretching.
Key Takeaway: Narrow pantries benefit from front-to-back storage lanes, corner shelves often need rotating or removable organizers, and tall pantries should keep heavy and frequently used products within comfortable reach.
How to Keep Food Fresh and Safe in a Deep Pantry
A clean layout should also support proper food storage.
Extra shelf depth can hide leaking packages, insects, and older food if the pantry is not inspected regularly.
Keep the Pantry Cool, Dry, and Away From Heat
The USDA recommends storing canned foods in a cool, dry location and identifies temperatures below 85°F as preferable for canned food storage.
Temperatures above 100°F can harm canned-food quality and increase the risk of spoilage.
Avoid placing shelf-stable groceries directly beside a stove, heating appliance, or hot pipe.
Check for moisture near walls, plumbing, and exterior corners.
A pantry that develops condensation, leaks, or persistent dampness needs the moisture problem corrected before food is returned.
Use Food Rotation Instead of Random Restocking
When adding groceries, place newer packages behind identical older products when appropriate.
This keeps the earlier purchase or earlier quality date visible.
For example, if two unopened boxes of pasta remain, place the newer box behind the older one.
Do not assume the newest purchase always has the latest date. Check the actual labels.
The FIFO system works well for shelf-stable products because it reduces the chance of older packages remaining forgotten at the back.
A simple inventory list is useful for bulk purchases.
Record the product name and quantity when the pantry contains several unopened replacements.
Protect Dry Goods From Pantry Pests
Flour, rice, cereals, nuts, and dried foods can attract pantry insects.
University of Maryland Extension recommends storing susceptible foods in tightly sealed glass, plastic, or metal containers.
Inspect packages when transferring groceries into storage.
Look for damaged seals, webbing, insects, or unusual residue.
If infestation is discovered, discard affected food and inspect nearby packages.
Vacuum cracks and corners, then clean and dry the shelves.
Avoid spraying insecticides inside food storage cabinets.
Check Food Dates Without Unnecessary Waste
Many packaged food dates indicate quality rather than an absolute safety deadline.
The USDA explains that “Best if Used By” generally refers to when a product is expected to have its best flavor or quality.
Still, storage conditions and packaging integrity matter.
Discard leaking, bulging, or badly rusted cans and food showing clear signs of spoilage.
Follow specific date and storage requirements for products such as infant formula.
Once a product requires refrigeration after opening, do not leave it in the pantry.
Key Takeaway: Keep pantry food cool and dry, rotate older groceries forward, inspect for pests, and follow package storage instructions instead of relying only on printed dates.
How to Organize a Deep Pantry on a Budget
An organized pantry does not require an expensive collection of matching containers.
Many storage problems can be corrected by rearranging groceries and using containers already available at home.
Start by grouping similar products.
Reuse sturdy, clean containers for dry packaged foods when they can be handled and cleaned safely.
For example, an existing plastic basket may hold snack packages, while a spare tray can group small seasoning jars.
Labels made from paper and removable tape are sufficient for identifying categories.
Move frequently used items forward before buying any organizers.
If the rear rows remain hidden, purchase one suitable bin or shelf riser and test it.
The following comparison shows where spending money may be justified.
| Storage Problem | Low-Cost Starting Solution | Optional Upgrade |
| Snacks scattered across shelves | Reused labeled baskets | Clear pull-out bins |
| Cans hidden in back rows | Group identical cans in rows | Tiered can risers |
| Bottles difficult to reach | Keep frequently used bottles at front | Lipped lazy Susan |
| Bulk packages creating clutter | Designated backup shelf | Heavy-duty storage containers |
| Deep cabinet difficult to access | Removable bins | Full-extension pull-out drawers |
| Dark shelves hiding products | Improve room lighting | Battery-operated cabinet lighting |
I would spend money on access before appearance.
A single organizer that solves a recurring problem is a better purchase than a matching container set that leaves groceries hidden.
Common Mistakes When Organizing Deep Pantry Shelves
Deep pantry organization can fail even after a careful initial arrangement.
The following mistakes are among the most common reasons clutter returns.
Filling every inch of shelf space: A completely packed shelf leaves little room to move containers or retrieve groceries. Leave enough clearance for items to be removed.
Buying organizers before measuring: Containers that fit the shelf may still be too wide to pass through the cabinet opening or too tall to lift out.
Storing unrelated items front to back: A jar of olives behind cereal boxes is easy to forget. Keep front and rear products in the same category.
Using opaque containers without labels: Solid baskets can conceal their contents. Label the front where it remains visible.
Placing heavy food on high shelves: Bulk rice, canned goods, and glass jars can be difficult to handle overhead. Keep heavier items lower.
Decanting everything into decorative jars: Transferring food takes time and may remove useful information from the original packaging. Decant only products that benefit from it.
Overloading pull-out organizers: Check the manufacturer’s load limit and test how the organizer moves when filled.
Ignoring the pantry door: The door may hit organizers or stored products if clearance is not checked.
Keeping too many backup groceries: Extra storage space can encourage purchasing more than the household will use before quality declines.
Skipping routine checks: Even an organized pantry needs occasional inspections for spills, damaged packaging, and older groceries.
The best arrangement is one that makes returning products to their assigned places nearly as simple as taking them out.
How to Maintain an Organized Deep Pantry
A pantry is unlikely to remain perfectly arranged without occasional maintenance.
The good approach is to build small tasks into an ordinary shopping and cooking routine.
Do a Quick Check Before Grocery Shopping
Before making a shopping list, look through the everyday food zones.
Check which products are nearly finished and which have unopened replacements.
Pull out bins containing backup groceries rather than judging inventory from the front row alone.
For example, if two unopened pasta packages remain behind the current box, there may be no reason to purchase more.
This prevents duplicate shopping and unnecessary stock accumulation.
Reset Shelves After Putting Groceries Away
Return new purchases to their assigned categories immediately.
Move older matching products toward the front.
Keep packaging from spreading into unrelated shelf zones.
If a product does not have a designated place, decide where it belongs rather than leaving it in an empty corner.
Avoid creating a permanent miscellaneous bin that eventually fills with forgotten groceries.
Inspect the Pantry Monthly
Once a month, check the deeper storage areas.
Look for damaged packages, moisture, spilled food, and signs of pests.
Review products that have been stored for a long time.
Wipe shelf surfaces as needed and check that pull-out organizers still move smoothly.
A periodic inspection is more manageable than waiting until the entire pantry needs to be emptied again.
Key Takeaway: Check inventory before shopping, rotate food during restocking, and inspect deep shelves regularly. Small maintenance habits keep the pantry usable without frequent full reorganizations.
Conclusion
The most practical answer to how to organize a deep kitchen pantry is to make the full depth of every shelf accessible. Group groceries by category, place frequently used products within reach, and use bins, risers, or turntables to prevent items from disappearing behind one another.
Start with the existing pantry rather than shopping for new containers. Remove clutter, measure the usable dimensions, create shelf zones, and test each storage arrangement with products inside. Keep food rotation, dry storage, and safe lifting in mind as the layout develops.
My recommendation is to begin with the shelf that causes the most frustration. A single pull-forward bin or a better arrangement of canned foods may solve more problems than a complete pantry makeover.
Once every product has a clear location and a predictable way to reach it, the pantry becomes easier to use during cooking, grocery shopping, and routine cleaning.
FAQs About Organizing a Deep Kitchen Pantry
What Is the Best Way to Organize Deep Pantry Shelves?
The best approach is to group groceries by category and use storage methods that make the rear of each shelf accessible.
Long pull-out bins work for packaged snacks, turntables suit bottles and jars, and risers improve canned-food visibility.
Store everyday foods near the front and keep backup products directly behind matching items. Avoid placing unrelated groceries in hidden back rows.
How Do You Organize a Pantry That Is Too Deep?
Start by measuring the shelf depth and identifying the areas that are difficult to reach.
Use full-depth removable bins to pull groups of items forward. Install suitable pull-out drawers if fixed shelves remain difficult to access.
Keep frequently used products within comfortable reach and reserve the deepest areas for clearly identified backup stock.
Do not fill the entire space if doing so makes groceries difficult to remove.
What Should Go on the Top Shelf of a Deep Pantry?
Top shelves are best for lightweight products that are used infrequently.
Examples include seasonal baking decorations, extra paper goods, empty food-storage containers, and occasional party supplies.
Avoid storing heavy canned goods, large glass jars, or bulky appliances overhead.
Use a stable step stool when needed, and keep products far enough from the edge that they cannot easily fall while being retrieved.
Are Lazy Susans Good for Deep Pantry Shelves?
Yes. Lazy Susans work well for bottles, condiment jars, oils, and smaller containers that are difficult to reach.
Rotating the organizer brings products from the back to the front without removing everything.
Choose a model with a raised rim for taller bottles.
Check that the turntable rotates freely inside the shelf and does not strike cabinet walls or neighboring containers.
How Do You Organize Cans in a Deep Pantry?
Group identical canned foods together and arrange them by their quality dates, keeping earlier-dated products toward the front.
Tiered risers can raise the back rows so labels remain visible.
A pull-out drawer or sturdy removable bin is another option for deep cabinets.
Keep heavy collections of cans on shelves that can support their weight and allow comfortable lifting.
Should You Use Clear Containers in a Deep Pantry?
Clear containers are useful because they make food easier to identify and show when supplies are running low.
They work well for pasta, rice, flour, cereal, and packaged snacks.
Still, transferring every food into a container is unnecessary.
Choose containers for products that need moisture protection, pest protection, or improved handling. Label each container and retain important information from the original packaging.
How Do You Organize a Deep Pantry Without Buying Organizers?
Begin by removing unused products and grouping similar foods together.
Move everyday groceries toward the front and keep backup packages behind identical products.
Reuse clean baskets, trays, or suitable containers already available at home.
Simple labels can identify different categories.
After rearranging, check if any shelf remains difficult to access. Purchase a storage accessory only when the existing arrangement cannot solve the problem.
How Often Should You Reorganize a Deep Kitchen Pantry?
A full reorganization is not necessary on a fixed schedule if the storage system continues to work.
Check inventory before grocery shopping, return new purchases to their designated locations, and inspect the deeper shelves approximately once a month.
Remove damaged food packages, clean spills, and rotate older groceries during these checks.
Reconsider the shelf layout when cooking habits, household size, or grocery purchasing patterns change.

2 Comments