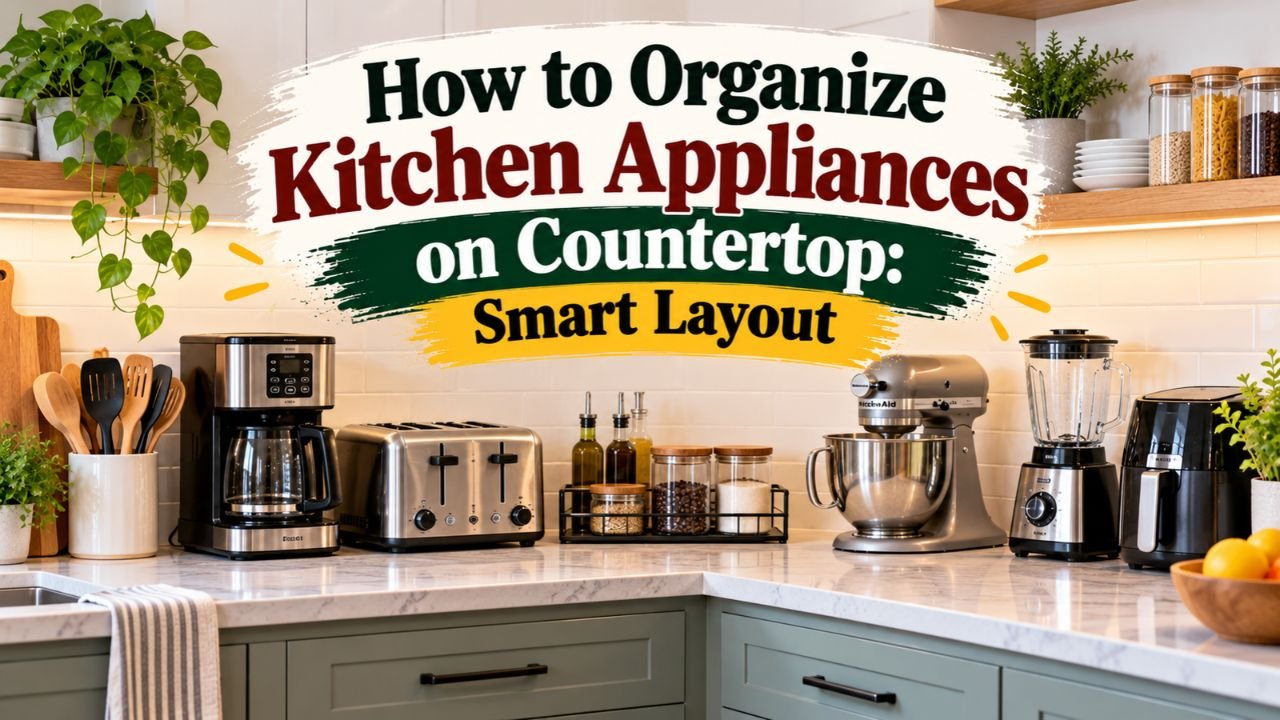
How to Organize Kitchen Appliances on Countertop: Smart Layout
To organize kitchen appliances on countertop surfaces, keep the machines you use every day within easy reach, group them by task, and store occasional-use equipment elsewhere. Set up a coffee or breakfast zone, reserve a safe place for heat-producing appliances, and leave an uninterrupted section for chopping and meal preparation.
A crowded counter makes even a large kitchen harder to use. Coffee makers, air fryers, blenders, stand mixers, and toasters compete for outlet space, while cords and accessories quickly spread into the areas needed for cooking. Moving everything into a cabinet isn’t always the answer, though. Heavy or frequently used appliances may be more practical to leave out.
The goal is to balance convenience, available workspace, and safety. Hot appliances need manufacturer-specified ventilation clearance, electrical cords must stay away from water and heat, and frequently used items should not block the sink or stovetop.
In this article, I explain how to sort appliances by frequency of use, arrange kitchen countertop zones, handle bulky machines, and choose storage solutions for small kitchens. You’ll also learn how to manage cords, maintain a safe prep area, and keep the setup organized after daily cooking.
How to Organize Kitchen Appliances on Countertop Step by Step

A practical countertop organization system starts with deciding which appliances deserve permanent counter space.
Rather than arranging everything by size or appearance, organize around the way you actually prepare meals.
Step 1: Remove Every Appliance From the Counter
Start by clearing the countertop completely.
Unplug each appliance before moving it, and make sure heat-producing equipment has cooled.
Gather smaller accessories such as:
- Blender jars and attachments.
- Coffee filters and measuring scoops.
- Toaster trays.
- Food processor blades.
- Stand mixer accessories.
- Air fryer baskets and racks.
- Electric kettle accessories.
Place these items together temporarily.
Cleaning the empty counter makes it easier to see the available workspace and identify areas where grease, crumbs, or moisture have collected.
It also helps you assess the layout without the distraction of crowded appliances.
Step 2: Sort Appliances by Frequency of Use
Divide your appliances into three groups.
| Usage frequency | Examples | Recommended location |
| Daily | Coffee maker, electric kettle, toaster | Countertop, if space allows |
| Weekly | Blender, food processor, stand mixer | Easy-access cabinet or counter if frequently needed |
| Occasional | Waffle maker, slow cooker, specialty appliances | Pantry, deep cabinet, or other suitable storage |
The categories should reflect your routine.
For example, someone who prepares smoothies every morning may need a blender on the counter.
Another household may use its blender only once a month, making cabinet storage more practical.
Ask yourself two questions about each appliance:
- How often do I use it?
- Would storing it make everyday cooking inconvenient?
An appliance that hasn’t been used for several months may not deserve permanent countertop space.
Step 3: Measure Your Available Countertop Space
Before returning appliances, measure the usable width and depth of the counter.
Include:
- Distance between the sink and stove.
- Countertop depth.
- Space beneath upper cabinets.
- Electrical outlet locations.
- Corner dimensions.
- Door and drawer clearance.
Also measure each appliance.
Record its width, depth, and height.
For appliances with lids, handles, hinged parts, or removable baskets, measure the space required during actual use.
A coffee maker may fit beneath an upper cabinet but lack enough clearance to open its water reservoir.
Similarly, an air fryer may fit against a backsplash while stored but require additional space when operating.
Important: Manufacturer-specified operating clearances take priority over the dimensions of the appliance itself.
Step 4: Create Kitchen Countertop Zones
Divide the counter into areas based on activities.
Most kitchens benefit from three basic zones:
- Beverage and breakfast preparation.
- Cooking and small-appliance operation.
- Food preparation.
Position appliances near the area where they will be used.
For example, a coffee maker belongs near mugs, coffee supplies, and a suitable outlet.
A toaster may be convenient near the breakfast preparation area, provided it has safe clearance from combustible materials.
Keep the main chopping and meal-preparation area as open as possible.
Step 5: Place Your Most-Used Appliances First
Return daily-use appliances before anything else.
Position them where they can be operated without repeatedly moving other equipment.
For example:
- Place the coffee maker in the beverage zone.
- Keep the toaster in a safe breakfast area.
- Position a frequently used stand mixer on a stable surface.
- Leave space to move a heat-producing appliance into its approved operating position.
Avoid filling every available corner immediately.
After positioning the essentials, evaluate how much usable space remains.
Step 6: Assign Storage for Less-Used Appliances
Move occasional-use appliances to cabinets, drawers, or pantry shelves.
Whenever practical, keep the appliance and its accessories together.
For example, store a food processor with its bowl, lid, and compatible blades in the same cabinet.
Use protective storage arrangements for sharp attachments.
Keep heavy equipment on sturdy, accessible shelves rather than high overhead locations.
The goal is to make appliances easy to retrieve without leaving everything on display.
Step 7: Organize Power Cords
Arrange appliances so cords can reach suitable outlets without stretching across the workspace.
Avoid tangled cords, dangling wires, and cords near the sink or hot cooking surfaces.
Use built-in cord storage when the manufacturer provides it.
Unplug equipment according to its safety instructions before securing cords for storage.
Don’t tightly wrap cords around appliances that are still hot.
Step 8: Test Your New Countertop Layout
Use the kitchen normally for several days.
Pay attention to whether you have to move appliances to:
- Wash vegetables.
- Prepare ingredients.
- Open cabinets.
- Access electrical outlets.
- Use the toaster or coffee maker.
- Clean the countertop.
If one appliance repeatedly blocks another task, move it.
A good organization system should reduce daily effort rather than require constant rearranging.
Which Kitchen Appliances Should Stay on the Countertop?
Not every appliance belongs on the counter.
The best candidates are those that are used frequently, difficult to move safely, or particularly convenient to leave in a dedicated location.
Coffee Makers and Espresso Machines
Coffee makers are often used daily, making them good candidates for permanent countertop space.
Choose a location near a suitable electrical outlet, with sufficient room to access the water reservoir.
Keep related supplies nearby:
- Coffee beans or grounds.
- Filters.
- Measuring scoops.
- Mugs.
- Tea supplies, if applicable.
Use a small tray or organizer for accessories rather than spreading them across the entire counter.
Keep the coffee maker away from the sink’s splash area and leave enough space to clean around it.
If the machine produces steam, check its required clearance from upper cabinets.
Toasters and Toaster Ovens
Toasters are convenient to leave out when used daily.
However, they produce heat and require careful placement.
Avoid positioning them directly against paper towels, curtains, plastic containers, or other combustible items.
Do not operate a toaster oven inside a closed cabinet or directly beneath low cabinetry unless the manufacturer explicitly approves that arrangement.
Keep the crumb tray accessible for regular cleaning.
If you use a toaster only occasionally, store it after it has cooled and been unplugged.
Air Fryers
Air fryers are often bulky, but some households use them almost every day.
If yours is used frequently, keeping it on the counter may be practical.
Choose a stable location with sufficient manufacturer-specified clearance.
Remember that air fryers can release hot air or steam during operation.
Avoid blocking exhaust vents.
If the machine is stored beneath upper cabinets, move it into a manufacturer-approved operating position before switching it on.
Never assume a few inches of space is sufficient for every model.
Stand Mixers
Stand mixers are usually heavier than many other small kitchen appliances.
Repeatedly lifting one from a low cabinet can be inconvenient.
If you bake regularly, keeping a stand mixer on a stable section of countertop may be more practical.
Place it where:
- The counter can support its weight.
- The mixer head can tilt or lift fully.
- The bowl can be removed.
- The power cord reaches a suitable outlet.
- The appliance doesn’t block a major prep area.
If you bake occasionally, consider a sturdy appliance lift or an accessible lower cabinet.
Blenders and Food Processors
Blenders and food processors are useful but can take up considerable countertop space.
For daily smoothie preparation, keep the blender base accessible and store extra jars or attachments nearby.
If the appliance is used only occasionally, store the entire unit in a cabinet.
A food processor with multiple blades and discs often benefits from organized cabinet storage rather than permanent counter placement.
Microwave Ovens
Countertop microwaves require stable support and adequate ventilation.
If your microwave is designed for countertop use, follow the manufacturer’s clearance instructions.
Do not enclose it in cabinetry unless the manufacturer permits that installation and the appropriate ventilation requirements are met.
A microwave can occupy a large portion of the available counter.
If countertop space is limited, consider whether an approved built-in, over-the-range, or other manufacturer-supported installation would better fit the kitchen.
Best Kitchen Countertop Zones for Small Appliances
Organizing appliances by task makes everyday cooking more efficient.
It also prevents unrelated equipment from spreading throughout the kitchen.
Create a Coffee and Beverage Station
A beverage station can include:
- Coffee maker or espresso machine.
- Electric kettle.
- Coffee or tea supplies.
- Frequently used mugs.
- A small tray for accessories.
Keep only the items used regularly on the counter.
Store extra mugs, unopened coffee packages, and replacement supplies in nearby cabinets.
This prevents the beverage station from becoming a general storage area.
If the space is narrow, a compact organizer may work better than several separate containers.
Build a Breakfast Appliance Zone
Group frequently used breakfast equipment in one area.
Depending on your routine, this might include a toaster, coffee maker, or blender.
However, avoid crowding heat-producing appliances together.
Each machine still needs adequate clearance and safe access.
Keep bread, cereal, and other food items in nearby storage rather than stacking them around hot equipment.
Reserve a Food Preparation Zone
The prep zone should remain as open as possible.
It is where you need room for:
- Cutting boards.
- Mixing bowls.
- Vegetables.
- Cooking ingredients.
- Measuring tools.
- Baking supplies.
If the layout permits, reserve an uninterrupted section of countertop approximately 24–36 inches wide.
This is a practical planning target, not a universal building requirement.
Even a smaller clear area can be useful in a compact kitchen.
Position frequently used ingredients and utensils in adjacent drawers or cabinets rather than leaving everything on the worktop.
Designate a Safe Hot-Appliance Area
Appliances such as air fryers, toaster ovens, and electric grills need appropriate operating space.
Place them on stable, heat-compatible surfaces and follow the manufacturer’s ventilation requirements.
Avoid locations where hot exhaust will blow directly against vulnerable materials.
The operating area should also allow safe access to the appliance’s basket, tray, lid, or door.
Do not treat a decorative countertop shelf or enclosed appliance garage as a suitable operating location without checking the appliance manufacturer’s instructions.
Key Takeaway: Group appliances by task, but never let convenience override the safety clearances and operating instructions for individual machines.
How to Organize Appliances on a Small Kitchen Countertop
Small kitchens require more selective storage because appliances can quickly occupy the entire work surface.
The best solution is usually to reduce the number of machines left out rather than adding more countertop organizers.
Keep Only Two or Three Essential Appliances Out
For a compact kitchen, start with the appliances used most frequently.
For example:
- Coffee maker.
- Toaster.
- Blender.
This is only an example.
If you rarely make toast but use an air fryer daily, replace the toaster with the air fryer.
The exact number of appliances depends on the available space and your routine.
A small counter with one useful appliance and a clear prep area is often more functional than one packed with four or five machines.
Use Narrow Countertop Corners for Storage
Corners may be useful for compact appliances or accessories.
However, avoid pushing heat-producing appliances into tight corners if this blocks ventilation.
For example, a coffee supply container or a small utensil organizer may fit well in a back corner.
A toaster oven or air fryer may need a more open location during use.
Keep appliance controls, plugs, and removable parts accessible.
Store Appliances in Lower Cabinets
Lower cabinets are often suitable for equipment that is heavy or used occasionally.
Examples include:
- Slow cookers.
- Food processors.
- Rice cookers.
- Waffle makers.
- Bread machines.
Use sturdy shelves and keep heavier items at a height that allows safe lifting.
Avoid storing a heavy stand mixer on an overhead shelf where retrieving it would be difficult.
Consider a Rolling Kitchen Cart
A sturdy rolling cart may provide extra storage in kitchens with limited built-in cabinets.
It can hold appliances or supplies when not in use.
Choose a cart with suitable weight capacity and locking wheels.
Do not operate a heat-producing appliance on a cart unless the appliance and cart are approved for that use and all electrical and ventilation requirements can be satisfied.
For many kitchens, a cart is most useful as a storage solution rather than a permanent cooking station.
How to Use Countertop Organizers Without Creating More Clutter
Organization accessories can help, but they should solve a specific problem.
Buying several racks and trays without measuring the kitchen may actually reduce usable space.
Sliding Appliance Trays
A sliding tray can make a frequently used appliance easier to reach.
It may be useful for a coffee maker or another suitable appliance that needs to move forward for access.
Check the tray’s load capacity, stability, and surface compatibility.
For heat-producing appliances, sliding forward does not automatically make the operating position safe.
The appliance still requires its specified clearances and a suitable support surface.
Appliance Garages
An appliance garage is a countertop-level cabinet designed to conceal small kitchen equipment.
It can provide a neat appearance and keep less-used appliances accessible.
However, closed cabinets can restrict airflow and create heat hazards.
Store appliances unplugged and cooled unless the manufacturer specifically approves operation within that enclosure.
Do not operate a toaster oven, air fryer, or similar appliance inside an ordinary closed appliance garage.
Countertop Shelves and Risers
Small shelves can organize lightweight accessories vertically.
For example, a shelf might hold coffee cups above a tray of tea supplies.
However, vertical storage should not block appliance vents or trap heat.
Avoid placing shelves directly above hot appliances unless the arrangement is approved for that use.
Check that the organizer is stable and can support the stored weight.
Trays for Small Accessories
A tray can help contain frequently used supplies.
Examples include:
- Coffee filters and scoops.
- Tea bags.
- Small measuring tools.
- Blender accessories.
Choose one tray per activity rather than adding several decorative trays to every available space.
The purpose is to reduce scattered items, not simply group clutter into containers.
How to Organize Kitchen Appliances on Different Countertop Layouts
The shape of the kitchen influences where appliances work best.
A layout that is practical in an L-shaped kitchen may be unsuitable for a narrow galley kitchen.
L-Shaped Kitchen Countertops
An L-shaped kitchen often has two connected counter runs.
A practical arrangement is to place a coffee station near one end and reserve part of the longer run for food preparation.
The corner can hold compact accessories or suitable storage.
Avoid letting an appliance block access to both sides of the corner.
If an air fryer or toaster oven occupies the corner, check whether it can be operated with proper clearance.
U-Shaped Kitchen Countertops
A U-shaped kitchen provides several counter sections.
This makes it easier to separate appliances by activity.
For example:
- One side for breakfast and drinks.
- A central section for meal preparation.
- Another section for suitable cooking appliances.
Avoid spreading small appliances across every counter simply because space is available.
Keeping at least one generous prep area open will make the kitchen more useful.
Galley Kitchen Countertops
A galley kitchen has two parallel runs of cabinets and countertops.
Appliances should be arranged to avoid blocking the narrow working aisle.
Choose compact equipment and position frequently used machines near suitable outlets.
Keep cords away from the counter edge.
Store rarely used appliances so both counter runs remain functional.
Kitchen Island Countertops
A kitchen island can provide valuable preparation space.
However, filling it with appliances may reduce its usefulness for meal preparation, dining, or serving.
If the island has suitable electrical outlets, it may accommodate certain small appliances.
Check outlet suitability, cord routing, and appliance clearances.
Avoid running cords across walkways or seating areas.
For most kitchens, keeping the island largely clear makes it more flexible.
How to Organize Kitchen Appliance Cords Safely
Cord management is an important part of countertop organization.
Tangled cords can make cleaning difficult and may create electrical or tripping hazards.
Keep Appliances Near Suitable Outlets
Position regularly used electrical appliances near appropriate outlets.
Avoid stretching cords across the sink or cooking area.
The Electrical Safety Foundation International’s kitchen safety guidance recommends using GFCI-protected outlets for countertop appliances, keeping appliances away from sinks, protecting cords from hot surfaces, and unplugging countertop appliances when they aren’t in use.
These precautions should influence your layout from the beginning.
Avoid Extension Cords for Heat-Producing Appliances
Air fryers, toaster ovens, and other heating appliances can draw substantial electrical power.
Use an appropriate wall outlet as required by the appliance manufacturer.
Do not rely on an ordinary extension cord or power strip simply because an outlet is inconvenient.
Overloaded or unsuitable electrical accessories can overheat.
If your kitchen lacks enough suitable outlets, a qualified electrician can evaluate safer options.
Use Built-In Cord Storage
Some appliances include cord-storage compartments or approved wrapping features.
Use them according to the manufacturer’s instructions.
For unplugged equipment in storage, a loose reusable cord strap can help keep the cord organized.
Do not bend cords sharply, trap them beneath heavy appliances, or wrap them tightly around equipment that is still hot.
Keep Cords Away From Water and Heat
Never route appliance cords across the sink or near hot stovetop burners.
Also avoid allowing cords to hang over the front edge of the counter.
A dangling cord can be caught or pulled accidentally.
If an outlet or cord becomes hot, damaged, or discolored, stop using the affected equipment and arrange an appropriate inspection.
How to Keep Countertop Appliances Safe Around Heat and Water
Countertop organization should account for how appliances operate, not just how they look while stored.
Leave Proper Ventilation Space
Heat-producing appliances often have vents on their backs, sides, or upper surfaces.
Blocking these openings can interfere with normal operation.
Different appliances require different clearances.
For that reason, there is no single spacing measurement suitable for every air fryer, microwave, toaster oven, or coffee machine.
Follow the manufacturer’s instructions for each appliance.
Avoid Operating Hot Appliances Under Low Cabinets
Hot air and steam can affect nearby cabinets and finishes.
If an appliance requires open space above or around it, move it into a suitable operating position.
Do not assume that the counter beneath an upper cabinet is safe simply because the appliance fits.
Check whether the door, lid, or basket can open without contacting nearby surfaces.
Keep Electrical Appliances Away From Sink Splashes
Coffee makers and electric kettles often need water, but they should not be positioned where splashes can reach electrical parts.
A nearby water source may be convenient, but safe separation remains important.
Use appropriate GFCI-protected outlets.
Keep plugs and electrical connections dry.
Avoid Stacking Appliances
Stacking a toaster oven directly on a microwave or placing another appliance on top of an air fryer can restrict ventilation and create unstable loads.
Only use stacked arrangements specifically approved by the manufacturers.
Separate storage shelves may be suitable for cooled, unplugged equipment when their load ratings and clearances are appropriate.
Don’t use improvised stacks to save a few inches of countertop space.
How to Keep Kitchen Countertops Clean Around Appliances
Appliances create areas where crumbs, grease, dust, and food residue can accumulate.
Cleaning should be part of the organization system.
Make Appliances Easy to Move for Cleaning
Avoid wedging every appliance tightly against neighboring objects.
Allow enough room to wipe the counter and clean around the base.
For heavier machines, use a safe movement method and avoid dragging rough feet across delicate countertop finishes.
If the appliance is difficult to move, clean the accessible surrounding areas regularly and follow its maintenance instructions.
Clean the Food Preparation Area After Cooking
The USDA Food Safety and Inspection Service’s kitchen safety guidance recommends cleaning countertops and utensils with hot, soapy water and keeping raw meat, poultry, seafood, and eggs from contaminating ready-to-eat foods.
This is another reason to preserve a separate, easy-to-clean preparation area.
Don’t allow appliances and storage containers to make routine surface cleaning unnecessarily difficult.
Remove Crumbs and Grease Frequently
Toasters, coffee makers, and cooking appliances may accumulate residue.
Follow each manufacturer’s cleaning instructions.
Empty crumb trays where provided.
Clean removable components as directed.
Allow appliances to cool and disconnect them from power before cleaning when required.
Avoid spraying water directly into electrical vents or controls.
Common Mistakes When Organizing Appliances on Kitchen Counters
Even a neatly arranged countertop can become inconvenient when storage decisions ignore daily tasks.
Keeping Every Appliance on Display
Leaving out rarely used machines reduces preparation space.
Store occasional-use appliances in suitable cabinets or pantry areas.
Choose countertop access based on actual use rather than ownership.
Placing Hot Appliances in Tight Corners
Corners may save space, but they can restrict heat and steam movement.
Never operate a heating appliance in a location that violates its ventilation instructions.
Blocking Cabinet Doors and Drawers
An appliance may fit on the countertop but prevent a nearby cabinet door from opening completely.
Check clearances before making its location permanent.
Placing Heavy Appliances Too High
Large stand mixers and other heavy appliances can be difficult to lift safely from upper cabinets.
Use accessible, weight-rated storage.
Filling the Main Prep Zone
A kitchen needs room for chopping, mixing, and arranging ingredients.
Don’t sacrifice the entire work surface to keep appliances visible.
Using Too Many Organizers
Stacked trays, baskets, racks, and decorative containers can occupy more space than the original items.
Choose accessories that solve a measured storage problem.
Ignoring Cord Safety
A visually neat appliance arrangement isn’t safe if cords cross the sink, run behind hot equipment, or overload outlets.
Plan electrical access alongside appliance placement.
Simple Countertop Appliance Organization Ideas by Kitchen Size
Different kitchen sizes benefit from different arrangements.
| Kitchen size | Appliances to prioritize | Recommended organization strategy |
| Very small kitchen | One or two most-used appliances | Store the rest in accessible cabinets |
| Small kitchen | Coffee maker, toaster, or another daily essential | Create one appliance zone and preserve a prep area |
| Medium kitchen | Two or three daily-use appliances | Separate breakfast and food-prep zones |
| Large kitchen | Several frequently used appliances | Use dedicated activity zones without filling every counter |
| Kitchen with island | Appliances on perimeter counters where practical | Keep the island mostly available for prep and serving |
These are starting points rather than fixed rules.
A small kitchen used for frequent baking may need a different arrangement from a larger kitchen where most meals require very little preparation.
Example: Small Kitchen With One Main Counter
Suppose the usable counter is approximately 6 feet long.
A workable arrangement might be:
- One end: compact coffee maker.
- Middle: open food-preparation area.
- Opposite end: suitable space for a toaster or another frequently used appliance.
Store the blender, food processor, and seasonal appliances in cabinets.
The actual placement should reflect sink position, outlet access, and manufacturer clearances.
Example: Medium Kitchen With Two Counter Runs
One counter can hold the beverage station and daily breakfast appliances.
The second can remain mostly open for meal preparation.
Store the stand mixer in a convenient location if used frequently.
Otherwise, keep it in accessible lower storage.
This arrangement reduces the need to move appliances every time you prepare food.
Example: Large Kitchen With Several Appliances
A larger kitchen may have room for a coffee maker, stand mixer, toaster, and other equipment.
However, don’t spread appliances randomly across the room.
Group them according to activities and preserve open surfaces between zones.
A spacious kitchen should still feel easy to clean and navigate.
How to Maintain an Organized Countertop Every Day
Once the appliances have suitable locations, a simple maintenance routine will help prevent clutter from returning.
Daily Countertop Reset
After meal preparation:
- Unplug appliances as directed.
- Allow hot equipment to cool.
- Clean used appliance components.
- Return accessories to their assigned storage.
- Wipe the work surface.
- Remove items that do not belong on the counter.
This keeps the preparation area ready for the next meal.
Weekly Appliance Check
Once a week, look for appliances that have been left out without being used.
Move unnecessary equipment back into storage.
Check for crumbs, grease, and tangled cords.
Reassess whether the remaining appliance positions are convenient.
Seasonal Storage Review
Some appliances are used more frequently during certain seasons.
For example, a slow cooker may become more useful during colder months, while a blender may be used more frequently in summer.
Adjust countertop storage when your cooking habits change.
A useful organization system should adapt to your routine.
Conclusion
Understanding how to organize kitchen appliances on countertop surfaces comes down to keeping frequently used equipment accessible while preserving enough room for everyday food preparation.
Start by removing everything from the counter and sorting appliances by how often they’re used.
Create separate beverage, cooking, and preparation zones, then place essential machines near suitable outlets.
Store occasional-use equipment in accessible cabinets, use organizers only when they solve a real storage problem, and follow manufacturer instructions for ventilation and electrical safety.
For small kitchens, the most effective change is often removing a few appliances rather than buying more storage accessories.
My recommendation is to keep only your daily essentials on the countertop and maintain one clear preparation area. That combination makes the kitchen easier to use, safer to work in, and simpler to clean.
FAQs About How to Organize Kitchen Appliances on Countertop
How Many Appliances Should You Keep on the Kitchen Counter?
There is no fixed number. Keep the appliances you use regularly while preserving sufficient food-preparation space. In a small kitchen, one to three frequently used machines may be practical, depending on their sizes and the available counter area.
Where Should You Put an Air Fryer on the Countertop?
Place an air fryer on a stable, suitable surface near an appropriate outlet. Leave the clearances required by its manufacturer and keep the exhaust away from combustible materials. Avoid operating it inside a closed cabinet or beneath low cabinetry if that violates the instructions.
How Do You Organize Appliances on a Small Kitchen Counter?
Prioritize daily-use appliances, group them into one or two activity zones, and store occasional-use equipment in cabinets. Use corners for suitable storage, manage cords, and keep a clear section for chopping and meal preparation.
Should a Coffee Maker Be Near the Sink?
A coffee maker can be near a water source for convenience, but it should be outside the sink’s splash area. Use an appropriate GFCI-protected outlet and keep electrical connections dry.
Can You Put Kitchen Appliances on Top of Each Other?
Only when the manufacturers approve the arrangement. Stacking appliances can block ventilation, create unstable loads, and cause heat-related hazards. Use sturdy, rated storage shelves for cooled, unplugged equipment instead of stacking active cooking appliances.
Is It Safe to Keep a Toaster Oven Under Kitchen Cabinets?
It depends on the manufacturer’s required operating clearances. Many toaster ovens need open space around their vents and hot surfaces. If an upper cabinet restricts the necessary clearance, move the appliance to a suitable location before operating it.
What Is the Best Way to Hide Kitchen Appliances?
Use accessible cabinets, a pantry, or an appliance garage designed for storage. Keep equipment unplugged and cooled when stored, and never operate heat-producing appliances inside an enclosure unless the manufacturer explicitly permits that setup.