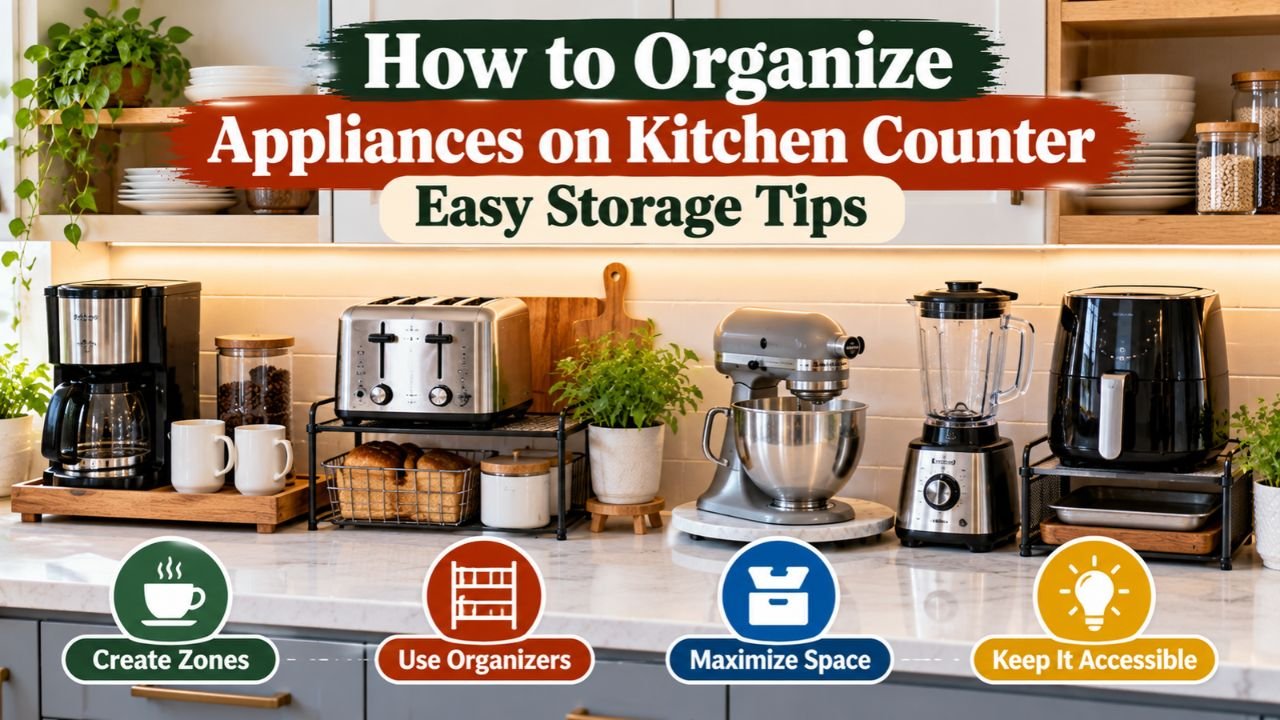
How to Organize Appliances on Kitchen Counter: Easy Storage Tips
The easiest way to organize appliances on a kitchen counter is to keep only frequently used machines within reach, group them by purpose, and store less-used appliances in cabinets, drawers, or a pantry. This creates more room for preparing meals without making everyday tasks inconvenient.
A crowded countertop can make even a reasonably sized kitchen feel small. Coffee makers, air fryers, toasters, blenders, and stand mixers quickly compete for the same space used for chopping vegetables, assembling meals, and unloading groceries.
The solution isn’t necessarily getting rid of your favorite appliances. It’s finding the right location for each one based on how often you use it, how much space it occupies, and whether it needs ventilation or a nearby electrical outlet.
A functional kitchen counter should provide both convenient appliance access and an uncluttered preparation area.
In this article, I explain how to organize appliances on kitchen counter surfaces using practical zones, smart storage solutions, and simple placement rules. I also cover where to put coffee makers, toasters, air fryers, blenders, and heavy mixers, plus ways to manage cords, protect countertops, and keep a small kitchen organized without sacrificing everyday convenience.
How to Organize Appliances on Kitchen Counter Step by Step
Organizing kitchen appliances becomes easier when you evaluate how you actually use your kitchen rather than arranging everything by size or appearance.
The following process works for most kitchens, including apartments, galley kitchens, and larger layouts.
Step 1: Remove Every Small Appliance From the Counter
Start by clearing the countertop of removable appliances.
This might include:
- Coffee maker.
- Electric kettle.
- Toaster.
- Toaster oven.
- Air fryer.
- Blender.
- Food processor.
- Stand mixer.
- Rice cooker.
- Slow cooker.
- Electric pressure cooker.
Place everything on a nearby table or another suitable surface.
Clean the empty counter before deciding where each appliance should go.
Seeing the available space without appliances makes it easier to identify useful work areas.
Step 2: Sort Appliances by How Often You Use Them
Separate your appliances into three categories.
| Usage Frequency | Examples | Suggested Storage |
| Daily | Coffee maker, electric kettle, toaster | Countertop if space allows |
| Weekly | Blender, air fryer, food processor | Accessible cabinet or dedicated appliance zone |
| Occasionally | Waffle maker, bread maker, specialty cooker | Pantry or lower cabinet |
These are examples rather than fixed rules.
If you use an air fryer every day, it may deserve a permanent countertop position.
If you make coffee only occasionally, storing the coffee maker might be more practical.
The goal is to match countertop space to your actual routine.
Step 3: Measure Your Available Counter Space
Use a tape measure to record the length and depth of the usable countertop.
Include areas beside the sink, near the refrigerator, and along the main cooking wall.
Then measure the appliances you want to keep out.
For each appliance, record:
- Width.
- Depth.
- Height.
- Door or drawer opening space.
- Required ventilation clearance.
- Cord length.
Don’t measure only the appliance body.
An air fryer may need additional room to pull out its basket, while a stand mixer with a tilting head needs vertical clearance.
Step 4: Identify Your Main Food Preparation Area
Before returning appliances to the counter, decide where you’ll prepare meals.
This area should accommodate tasks such as chopping vegetables, mixing ingredients, and assembling food.
If possible, preserve approximately 24–36 inches of uninterrupted workspace as a practical organizing goal. More room may be desirable for frequent cooking.
The exact amount depends on the kitchen.
The National Kitchen & Bath Association’s kitchen organization guidance emphasizes preserving valuable counter space and using storage solutions to reduce clutter.
In a small kitchen, protecting one convenient preparation area is often more useful than spreading appliances evenly across every surface.
Step 5: Put Daily Appliances Back First
Return only the appliances you use most often.
Position them where their tasks naturally happen.
For example:
- Coffee maker near mugs and coffee supplies.
- Toaster near the breakfast area.
- Blender near a suitable food-preparation zone.
- Electric kettle close to the beverage station.
Keep the main chopping and meal-preparation area open.
Step 6: Find Storage for Everything Else
Move less frequently used appliances into suitable storage locations.
Good options include lower cabinets, deep drawers, pantries, and accessible appliance storage compartments.
Place heavy appliances on sturdy shelves at a comfortable lifting height.
Avoid storing heavy stand mixers or pressure cookers high above shoulder level.
The best storage location is one where you can retrieve the appliance safely without moving several other items.
Step 7: Check Electrical Safety and Accessibility
After arranging appliances, confirm that each one can be used safely.
Make sure cords aren’t stretched across the sink, range, or main preparation area.
Keep heat-producing appliances clear of combustible materials and provide the ventilation specified by their manufacturers.
Don’t place appliances where their cords can be pulled by children or caught while moving kitchen equipment.
Key Takeaway: Start with your food-preparation space, then give permanent countertop positions only to appliances that earn them through frequent use.
Which Kitchen Appliances Should Stay on the Counter?
Not every small appliance needs a permanent place on the countertop.
The decision should depend on convenience, size, weight, and frequency of use.
Coffee Maker
A coffee maker often deserves a permanent position when you use it every morning.
Keeping it on the counter eliminates the need to retrieve and store it repeatedly.
However, place it where the water reservoir can be refilled and the machine can be cleaned easily.
Avoid trapping steam beneath low cabinets.
Electric Kettle
An electric kettle can remain on the counter when used frequently.
Position it on a stable, dry surface near a suitable outlet.
The cord shouldn’t cross the sink or hang over the countertop edge.
Allow room to fill the kettle and pour hot water without reaching over other appliances.
Toaster
A toaster is convenient to leave out when breakfast preparation is part of your daily routine.
However, a toaster produces substantial heat and requires appropriate clearance.
Avoid placing it beneath low shelves or near towels, paper products, and other combustible materials.
Follow the manufacturer’s instructions for placement and unplugging after use.
Air Fryer
An air fryer may stay on the counter if you use it several times per week.
However, it occupies considerable space and needs proper airflow.
Don’t assume it can safely operate beneath wall cabinets or inside a storage compartment.
Check the required clearances for your specific model.
Blender
A blender can remain on the counter when used daily for smoothies, sauces, or other preparations.
For occasional use, store it in an accessible cabinet.
If the blender is tall, check its height before placing it beneath upper cabinets.
Stand Mixer
A stand mixer is often heavy, making repeated lifting inconvenient.
If you bake regularly, a permanent countertop location may be worthwhile.
If you use it infrequently, a sturdy lower shelf or suitable mixer lift can be a better solution.
The mixer needs adequate clearance for its bowl, attachments, and moving head.
Food Processor and Specialty Cookers
Food processors, waffle makers, bread makers, and similar appliances usually don’t need permanent countertop positions unless used frequently.
Store them where their accessories can remain together.
This helps keep the counter available for everyday cooking.
How to Arrange Kitchen Appliances by Zones
Organizing appliances into activity zones creates a more efficient countertop layout.
Instead of placing machines wherever they fit, assign each section a specific purpose.
Coffee and Beverage Zone
Group beverage-related equipment together.
Depending on your routine, this area may include:
- Coffee maker.
- Electric kettle.
- Coffee grinder.
- Mug storage.
- Coffee beans or tea.
- Small container for filters.
Position the station near an appropriate electrical outlet and a convenient route to the sink, but outside the sink’s splash area.
Keep most supplies in a drawer or cabinet rather than displaying every item.
A compact beverage zone can reduce clutter elsewhere.
Breakfast Zone
A breakfast station may include a toaster and frequently used breakfast supplies.
Store bread, plates, utensils, and related items nearby when practical.
Avoid placing flammable packages or paper towels close to a toaster during operation.
If your coffee maker and toaster occupy the same section, make sure there is enough room to operate both without crowding.
Main Cooking Zone
The cooking zone includes appliances used to prepare meals.
Depending on your habits, this might involve an air fryer, rice cooker, or electric pressure cooker.
Place these appliances on stable surfaces with the necessary ventilation.
Keep them away from the stovetop and other external heat sources.
Don’t crowd hot appliances against one another.
Food Preparation Zone
The preparation zone should remain as open as possible.
This is where you need space for:
- Cutting boards.
- Mixing bowls.
- Ingredients.
- Food preparation containers.
- Measuring equipment.
A blender or food processor can be brought into the area when needed.
Avoid permanently occupying the center of this workspace with rarely used machines.
Baking Zone
If you bake frequently, consider a dedicated area for a stand mixer and baking supplies.
Keep measuring tools, attachments, and mixing bowls in nearby storage.
A mixer can remain on the counter if enough workspace is available.
Otherwise, use a safe, easily accessible storage location.
Key Takeaway: Group appliances by the tasks they support, but don’t allow the zones to consume the entire countertop.
How to Organize Appliances on a Small Kitchen Counter
Small kitchens require more selective countertop organization because every appliance occupies valuable preparation space.
The goal should be functional access rather than fitting as many machines as possible onto the counter.
Keep Only Two or Three Essential Appliances Out
For a compact kitchen, start by selecting the two or three appliances you use most often.
For example:
- Coffee maker.
- Toaster.
- Electric kettle.
If an air fryer is used more frequently than the toaster, it may take that position instead.
There’s no universal limit on the number of appliances, but fewer permanent items generally create more usable space.
Use the Counter Ends Carefully
The ends of countertops can provide useful appliance locations.
However, don’t place appliances at edges where they could be knocked off.
Avoid blocking cabinet doors, drawers, or walkways.
A stable position with appropriate operating clearance is more important than using every available inch.
Make Better Use of Corners
Corners can hold certain appliances without occupying the center of a preparation surface.
A coffee maker or blender may fit well in a corner if it remains easy to operate and clean.
However, deep corners beneath low cabinets may be unsuitable for appliances that release steam or heat.
Don’t force an appliance into a location where ventilation or access is inadequate.
Choose Multifunctional Appliances
One appliance that performs several useful tasks may save space compared with multiple separate machines.
For example, a combination appliance may replace equipment that would otherwise occupy several storage areas.
However, choose based on actual functionality.
A multifunctional appliance isn’t useful if it performs poorly or is so large that it dominates the counter.
Avoid Excessive Countertop Decorations
Decorative containers, trays, and accessories can make a kitchen attractive.
However, too many of them compete with working space.
Limit decorative items and prioritize practical storage.
A countertop doesn’t need to be completely empty, but it should remain easy to use.
How to Store Kitchen Appliances Without Counter Space
When the countertop becomes crowded, consider moving appliances into nearby cabinets or other storage areas.
The best solutions keep appliances accessible while reducing visual clutter.
Lower Kitchen Cabinets
Lower cabinets are useful for storing larger appliances.
They are often suitable for:
- Food processors.
- Slow cookers.
- Bread makers.
- Blenders.
- Electric pressure cookers.
Use sturdy shelves that can support the appliance’s weight.
Store frequently used equipment toward the front.
Avoid stacking heavy appliances directly on top of one another.
Deep Kitchen Drawers
Deep drawers can be convenient for smaller appliances when their construction supports the load.
Measure the appliance’s height before deciding.
Keep cords contained and accessories together.
Avoid putting heavy equipment into drawers without confirming the drawer and slide ratings.
Pull-Out Cabinet Shelves
Pull-out shelves make appliances easier to reach without searching through deep cabinets.
They can be especially useful for items used several times per week.
However, most ordinary pull-out shelves are for storage and retrieval, not for operating hot appliances.
Unless the shelf and surrounding cabinet are specifically designed and approved for operation, move the appliance to a suitable countertop before using it.
Pantry Shelves
A pantry can hold appliances that you use occasionally.
For example:
- Waffle maker.
- Ice cream maker.
- Specialty blender.
- Bread maker.
- Extra food processor attachments.
Keep heavy appliances on lower, sturdy shelves.
Group accessories with their machines to avoid searching for missing parts.
Rolling Kitchen Carts
A rolling cart can provide additional storage in kitchens with limited cabinets.
Use a stable cart with locking wheels where appropriate.
A cart may be useful for storing equipment or transporting it to a work area.
However, don’t operate heat-producing appliances on a cart unless it provides a safe, stable, manufacturer-approved surface and suitable electrical access.
Don’t run extension cords across walking areas to power appliances stored on a cart.
How to Use an Appliance Garage to Hide Countertop Clutter
An appliance garage is a cabinet-style compartment designed to store small appliances near the countertop.
It can be built into cabinetry or installed as a separate storage feature.
The main benefit is keeping appliances accessible while reducing visual clutter.
What Appliances Can Go in an Appliance Garage?
Depending on its dimensions, an appliance garage may store:
- Coffee maker.
- Blender.
- Toaster.
- Electric kettle.
- Small food processor.
However, storage suitability doesn’t automatically mean the appliance can operate inside the compartment.
Can You Use Appliances Inside an Appliance Garage?
Only when the appliance, cabinet, ventilation arrangement, and electrical installation are specifically designed and approved for that use.
Many heat-producing appliances must be moved onto an open, suitable countertop before operation.
Toasters, toaster ovens, air fryers, and appliances that release steam can present heat or moisture hazards in enclosed spaces.
Don’t operate them behind a closed cabinet door.
How to Organize an Appliance Garage
Use the available space according to appliance height and frequency of use.
Place the most frequently retrieved items toward the front.
Keep accessories in nearby drawers or containers.
Avoid stacking appliances or blocking ventilation openings.
Keep the compartment clean and dry.
How to Organize Coffee Makers, Toasters, and Air Fryers Together
These three appliances frequently compete for countertop space.
They can sometimes share a general area, but their operating requirements differ.
Place the Coffee Maker Where Water Is Convenient
A coffee maker should be easy to refill without moving other appliances.
Keep mugs, filters, and coffee supplies nearby.
If the machine releases steam upward, provide the clearance required by the manufacturer.
Avoid placing it directly beneath materials that may be damaged by repeated steam exposure.
Give the Toaster a Safe Operating Space
The toaster needs an appropriate location away from combustible materials.
Don’t surround it with paper towels, plastic packaging, or cloth accessories.
Keep its cord away from hot surfaces.
Clean its crumb tray according to the manufacturer’s instructions.
Leave Room for the Air Fryer to Ventilate
Air fryers release hot air and, depending on the food and model, may also release steam.
Some models require significant clearance around exhaust openings.
Don’t assume that an air fryer can be pushed against the backsplash or operated beneath a cabinet.
Use the specific manufacturer’s minimum clearance requirements.
Avoid Using High-Power Appliances on the Same Circuit Simultaneously
Toasters, air fryers, kettles, and similar appliances can draw substantial electrical power.
Using several at once may overload a circuit.
Plug appliances into suitable outlets and follow their electrical requirements.
If a breaker repeatedly trips, stop using that arrangement and have the issue evaluated by a qualified electrician.
Key Takeaway: Coffee makers, toasters, and air fryers can be organized within one broad kitchen area, but each needs safe access, adequate space, and appropriate electrical connections.
Kitchen Counter Appliance Cord Organization and Safety
Power cords can make an otherwise organized countertop look cluttered.
However, hiding cords shouldn’t create electrical hazards.
The goal is to keep cords orderly without damaging them or making safe disconnection difficult.
Use Nearby Electrical Outlets
Place appliances close enough to suitable outlets that their original cords can reach comfortably.
Avoid stretching cords across preparation areas or walkways.
Don’t position electrical appliances where they could fall into a sink.
The Electrical Safety Foundation International’s kitchen safety guidance recommends using GFCI-protected outlets for countertop appliances, keeping appliances away from sinks, and keeping cords clear of hot surfaces.
These are important considerations when choosing permanent appliance locations.
Avoid Extension Cords for Permanent Appliance Setups
Don’t use an extension cord as a permanent solution for an appliance that cannot reach an outlet.
Heat-producing appliances should generally be plugged directly into a suitable wall receptacle according to their manufacturers’ instructions.
If your countertop lacks enough outlets, consult a qualified electrician about appropriate options.
Avoid daisy-chaining power strips or using outlet multipliers as a substitute for adequate electrical capacity.
Keep Cords Away From Water
Electrical cords shouldn’t cross the sink or rest where water regularly accumulates.
Position appliances outside areas exposed to direct splashing.
Keep hands dry when handling plugs.
If an appliance or electrical connection becomes wet, follow the appropriate safety procedure rather than continuing to use it.
Don’t Run Cords Behind Hot Appliances
A tidy cord shouldn’t be tucked against a toaster, air fryer exhaust, or other hot surface.
Heat can damage cord insulation.
Keep cords away from cooktop burners and heated appliance surfaces.
Use Cord Organizers Carefully
Suitable cable clips or cord-management accessories can help with low-risk cord routing when used according to their instructions.
However, don’t pinch, tightly bend, staple, or wrap cords in ways that may damage them.
Don’t attach cord organizers where they block appliance ventilation.
If the manufacturer provides built-in cord storage, use it as directed.
Keep Appliance Plugs Accessible
Avoid positioning heavy appliances so tightly against walls that their plugs become inaccessible.
You should be able to disconnect an appliance safely without moving several other machines.
Unplug countertop appliances such as toasters when not in use, following the manufacturer’s safety guidance.
How Much Space Should You Leave Around Countertop Appliances?
Appliances need more than enough room to physically fit on a counter.
Some require extra clearance for airflow, heat, steam, doors, lids, and moving parts.
There’s no universal clearance distance for all small kitchen appliances.
Air Fryer Clearance
Air fryers have intake and exhaust areas that must remain unobstructed.
The required clearance varies by model.
Measure the space around the appliance according to its instruction manual.
Don’t operate an air fryer inside a tight cabinet or under a low shelf unless the specific installation is approved.
Toaster Oven Clearance
Toaster ovens can produce significant heat around their exterior surfaces.
Keep combustible materials away and maintain manufacturer-specified clearances.
Don’t place trays, containers, or other appliances on top unless expressly permitted.
Coffee Maker Clearance
Coffee makers may require additional space above or behind the unit.
Consider steam release and access to water reservoirs.
Some machines have top-opening lids that need room to operate.
Stand Mixer Clearance
Stand mixers require enough room for the bowl, attachments, and mixing head.
Tilt-head models need vertical clearance when the head opens.
Make sure the mixer sits on a stable surface and won’t move toward the counter edge during operation.
Pressure Cooker and Rice Cooker Clearance
These appliances may release hot steam.
Avoid directing steam toward cabinets, walls, electrical outlets, or people.
Never cover a steam vent or operate the cooker in an enclosure that restricts safe ventilation.
Follow the manufacturer’s placement instructions.
Best Appliance Layout Ideas for Different Kitchen Shapes
Kitchen layout influences where appliances can be placed conveniently.
A strategy that works in a large L-shaped kitchen may be impractical in a narrow galley kitchen.
Small Galley Kitchen
A galley kitchen has two parallel runs of cabinets and counters.
Choose one section as the main food-preparation area.
Place frequently used appliances along the other run when possible.
If both sides are limited, prioritize only essential appliances.
Avoid placing cords or objects where they interfere with movement through the narrow walkway.
L-Shaped Kitchen
An L-shaped kitchen often provides opportunities to separate tasks.
For example:
- One section for beverage preparation.
- One section for food preparation.
- A suitable corner for an appliance that doesn’t require enclosed operation.
Keep frequently used appliances near relevant storage.
Avoid placing tall appliances where they block cabinet doors or make corners difficult to access.
U-Shaped Kitchen
A U-shaped kitchen may offer more countertop space, but clutter can still accumulate.
Assign one area to preparation, one to cooking-related tasks, and another to beverages or small appliances.
Use cabinets to store occasional-use machines.
Keeping the central working areas open makes the layout easier to navigate.
Kitchen With an Island
A kitchen island can provide valuable preparation space.
However, filling the island with appliances may reduce its usefulness.
Consider keeping the island mostly clear for meal preparation or serving.
Only place appliances there when suitable electrical access, stability, and operating clearances are available.
Don’t run cords across walkways to reach an island appliance.
Kitchen With One Short Counter
In an apartment or compact kitchen with very little countertop space, permanent placement should be selective.
You may find it practical to keep only a coffee maker and one other daily appliance out.
Store the blender, air fryer, and specialty cookers nearby.
Bring them out when needed, then return them after cooling and cleaning.
Space-Saving Accessories for Kitchen Appliance Organization
You don’t necessarily need expensive custom cabinetry to improve countertop organization.
A few practical storage features may help.
Appliance Sliding Trays
Sliding trays can make certain heavy appliances easier to reposition on a countertop.
They may be useful for a coffee maker or another compatible appliance.
However, the tray must support the appliance’s weight and remain stable.
Don’t slide an appliance while it contains hot liquid or is operating unless the manufacturer specifically approves that use.
Pull-Out Mixer Lifts
Mixer lifts are designed to raise certain heavy stand mixers from a lower cabinet.
These systems can reduce repeated lifting.
However, the lift, cabinet, and mounting hardware must support the mixer’s weight and operating forces.
Not every lift is intended for operating the mixer while extended.
Follow the hardware and appliance manufacturers’ specifications.
Countertop Shelves
A small shelf can create additional storage for lightweight, nonheated accessories.
For example, it may hold mugs or supplies above an otherwise unused part of the counter.
However, don’t place shelves over heat-producing appliances unless the entire arrangement provides the required clearances.
Avoid placing heavy machines on decorative shelves not rated for their weight.
Drawer Organizers
Drawer dividers can keep appliance accessories accessible.
These are useful for:
- Blender attachments.
- Mixer beaters.
- Coffee filters.
- Measuring tools.
- Food processor blades.
Use protective storage for sharp blades.
Keeping accessories organized reduces the need to leave them scattered across the counter.
Storage Baskets and Bins
Bins can hold small accessories in a cabinet or pantry.
Label containers when several appliances use similar-looking parts.
Avoid storing damp components in enclosed containers.
Allow parts to dry completely before putting them away.
How to Organize Heavy Kitchen Appliances Safely
Heavy appliances require special attention because repeated lifting can be inconvenient and unsafe.
Keep Heavy Machines on Stable Surfaces
Stand mixers, large food processors, and some pressure cookers can weigh considerably more than small toasters.
Choose shelves or cabinets that are designed for the load.
Avoid lightweight, unstable stands.
Store Frequently Used Heavy Appliances at Accessible Heights
If a heavy appliance is used regularly, storing it too low or too high can make retrieval difficult.
A sturdy pull-out shelf or manufacturer-approved lift may be useful.
If the appliance remains on the counter, make sure it doesn’t obstruct normal food preparation.
Avoid Overhead Storage for Heavy Appliances
High cabinets are usually better suited to lighter items.
Lifting a heavy mixer or pressure cooker above shoulder level can be difficult, especially in a narrow kitchen.
Choose lower, stable storage.
Don’t Stack Heavy Appliances
Stacking appliances can create stability and ventilation problems.
Don’t place a toaster, blender, or air fryer on top of another appliance unless the manufacturers specifically permit that arrangement.
A stack may look organized but still be unsafe.
How to Keep Kitchen Counters Organized With Multiple Appliances
When you own several small appliances, organization depends on maintaining a consistent system.
The goal isn’t to eliminate useful equipment but to prevent occasional-use items from permanently occupying valuable space.
Use a One-In, One-Out Countertop Rule
Before giving a new appliance a permanent countertop position, decide whether an existing appliance should move into storage.
This doesn’t necessarily mean discarding the old machine.
It simply prevents the counter from becoming more crowded every time you purchase something new.
Keep Accessories Near Their Appliances
Store attachments where they’re easy to retrieve.
For example, keep blender accessories in a drawer near the blender’s storage location.
This helps prevent small parts from collecting on the countertop.
Avoid Duplicate Appliances
Review whether you actually need several machines that perform similar tasks.
For example, if a combination oven already handles most of your toasting needs, a separate toaster may not need a permanent counter position.
However, don’t discard a useful appliance solely because another machine offers a similar feature.
Consider convenience and actual performance.
Rotate Appliances by Season or Routine
Your appliance needs may change during the year.
For example, a blender may be used daily during a period when you frequently make smoothies.
A slow cooker may receive more use at another time.
Adjust countertop placement to reflect current routines.
There’s no requirement to keep every appliance in the same location forever.
Common Mistakes When Organizing Kitchen Counter Appliances
Filling Every Available Countertop Space
A completely filled counter may look like efficient storage, but it leaves little room for preparing meals.
Protect an accessible work area before assigning appliance positions.
Keeping Rarely Used Appliances Out
An appliance used once a month generally doesn’t need to occupy a prime countertop position.
Move it into suitable storage if practical.
Putting Heat-Producing Appliances Under Low Cabinets
Toasters, air fryers, and similar appliances may need substantial clearance.
Crowded placement can expose nearby materials to heat or steam.
Follow each appliance’s specific instructions.
Placing Electrical Appliances Too Close to the Sink
Water and electricity create serious safety concerns.
Keep appliances out of splash-prone areas and use properly protected outlets.
Hiding Cords in Unsafe Ways
Don’t trap cords beneath appliances, pinch them behind heavy equipment, or route them near hot surfaces.
Organize cords without compromising their condition or accessibility.
Stacking Appliances to Save Space
Stacking can block ventilation, create instability, or interfere with operation.
Use suitable storage furniture rather than treating appliances as shelves.
Ignoring Appliance Doors and Moving Parts
An appliance may fit perfectly while closed but require additional space to operate.
Check blender lids, mixer heads, toaster oven doors, and air fryer baskets.
Using Storage Systems That Are Difficult to Access
A complicated storage solution may discourage you from putting things away.
Keep everyday equipment convenient and occasional-use appliances accessible without excessive lifting.
A Simple Kitchen Counter Appliance Organization Plan
The following example shows how a crowded countertop can become easier to use without removing every appliance from the kitchen.
Before Organizing
Imagine a small kitchen counter holding:
- Coffee maker.
- Toaster.
- Blender.
- Air fryer.
- Stand mixer.
- Food processor.
All six appliances occupy the countertop, leaving limited space for preparing meals.
Some items are used daily, while others are used only occasionally.
After Organizing
Rearrange the appliances according to their actual use.
| Appliance | Frequency | New Location |
| Coffee maker | Daily | Beverage zone on counter |
| Toaster | Daily | Safe countertop location |
| Blender | Twice weekly | Accessible lower cabinet |
| Air fryer | Several times weekly | Dedicated counter position if space and clearances allow |
| Stand mixer | Occasionally | Sturdy lower shelf or suitable mixer lift |
| Food processor | Occasionally | Pantry or lower cabinet |
This arrangement can reduce the permanent countertop appliances from six to two or three.
The exact result depends on how much space is available and which equipment is used most often.
The cleared area can then be used for food preparation instead of appliance storage.
How to Maintain the New Setup
After each use:
- Switch off and unplug appliances as directed.
- Allow hot appliances to cool.
- Clean removable parts.
- Wipe the surrounding counter.
- Return occasional-use appliances to their assigned locations.
- Keep the main preparation area clear.
An organization system works best when returning appliances to storage is simple.
How Often Should You Clean and Reorganize Kitchen Appliances?
A tidy countertop requires some maintenance, but it shouldn’t take much time every day.
Daily Countertop Reset
After cooking or preparing drinks:
- Remove crumbs and spills.
- Wipe accessible surfaces.
- Clean appliance exteriors as appropriate.
- Return accessories to storage.
- Keep cords orderly.
- Clear the main preparation area.
Allow appliances to cool before cleaning or moving them.
Weekly Appliance Check
Once a week, inspect frequently used appliances.
Clean crumb trays, drip trays, and removable parts according to their manuals.
Move appliances when safe and necessary to clean the countertop beneath them.
Check for food residue and moisture buildup.
Monthly Organization Review
Review whether the current layout still matches your routine.
Ask yourself:
- Which appliances have I used regularly?
- Which items are occupying space unnecessarily?
- Is my main preparation area clear?
- Are the cords safely positioned?
- Can I reach stored appliances without difficulty?
Move appliances between countertop and cabinet storage as your habits change.
This prevents clutter from gradually returning.
Conclusion
Learning how to organize appliances on kitchen counter surfaces starts with deciding which machines truly need to remain visible and accessible.
Keep frequently used appliances in practical locations, group them into task-based zones, and move occasional-use equipment into sturdy cabinets, drawers, or pantry storage.
Coffee makers, toasters, and other everyday machines may deserve permanent positions, while blenders, stand mixers, food processors, and specialty cookers can often be stored elsewhere when not in regular use.
Safety matters as much as appearance. Maintain proper ventilation, keep cords away from water and heat, and follow each appliance’s operating and storage instructions.
For most kitchens, I recommend preserving one clear food-preparation area before deciding where appliances should go. This simple priority makes the counter easier to clean, safer to work on, and more convenient for everyday meals.
FAQs About How to Organize Appliances on Kitchen Counter
How Many Appliances Should I Keep on My Kitchen Counter?
There is no fixed number.
In a small kitchen, keeping two or three frequently used appliances on the counter may provide a practical balance.
In a larger kitchen, more appliances may fit comfortably.
The important factors are usable preparation space, safe clearances, and convenient access.
Where Should I Put Appliances in a Small Kitchen?
Keep daily-use appliances in convenient countertop locations near suitable outlets.
Store less-used machines in lower cabinets, deep drawers, or a pantry.
Choose locations that make retrieval easy without crowding the main preparation area.
Should I Keep My Air Fryer on the Counter?
An air fryer can remain on the counter if you use it frequently and have enough space.
However, maintain the ventilation clearances required by the manufacturer.
Don’t operate it inside an ordinary enclosed cabinet or directly beneath low shelves unless the setup is specifically approved.
How Do You Hide Kitchen Appliances on the Counter?
An appliance garage can conceal small appliances while keeping them accessible.
You can also use nearby cabinets or suitable pull-out storage.
However, hiding an appliance doesn’t mean it can safely operate in an enclosed space.
Heat- and steam-producing appliances often need to be moved into an appropriate open operating position.
Where Should a Coffee Maker Go on the Kitchen Counter?
Place the coffee maker near beverage supplies and a suitable electrical outlet.
Allow room to refill its water reservoir and clean the machine.
Avoid exposing low cabinets to excessive steam.
Keep the machine away from direct sink splashing.
Is It Safe to Put a Toaster Under Kitchen Cabinets?
A toaster may require substantial clearance from cabinets and combustible materials.
Follow the manufacturer’s specific placement instructions.
Don’t operate a toaster in a tightly enclosed space or beneath low shelving if the required clearances cannot be maintained.
Where Should I Store a Heavy Stand Mixer?
A sturdy lower shelf, suitable pull-out cabinet system, or manufacturer-approved mixer lift can provide convenient storage.
If you use the mixer frequently and have sufficient counter space, leaving it on a stable countertop may be easier.
Avoid high cabinets that require lifting the heavy machine overhead.
Can You Stack Kitchen Appliances to Save Space?
Generally, avoid stacking appliances unless their manufacturers specifically approve the arrangement.
Stacking can create instability, block ventilation, and expose equipment to heat.
Use appropriately rated storage shelves or cabinets instead.
How Do I Organize Kitchen Appliance Cords?
Place appliances near suitable outlets and keep cords away from water, heat, and countertop edges.
Use approved cord-storage features when available.
Avoid pinching, tightly wrapping, or routing cords beneath appliances.
Don’t rely on permanent extension-cord arrangements for countertop cooking appliances.
How Do I Keep Kitchen Counters Clutter-Free?
Assign permanent locations to daily-use appliances and store occasional-use machines elsewhere.
Keep accessories in drawers or cabinets, preserve a clear food-preparation area, and return equipment after use.
A short daily cleaning and reset routine helps prevent clutter from building up again.